
As a Shopify expert, I often work with merchants seeking a faster way to coordinate promotions, seasonal campaigns, and storefront updates. The challenge is rarely creating the content. It is making sure the right banner, block, announcement, or promotional section appears at exactly the right time, then disappears when the campaign ends.
Manual theme edits create unnecessary risk. A missed update can leave an expired offer live, while publishing an entire theme for one small content change can disrupt other storefront improvements.
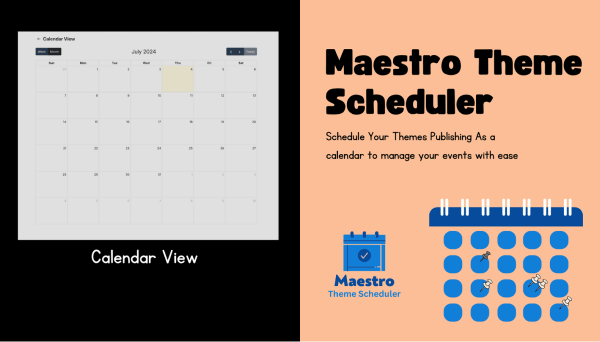
Maestro Theme Scheduler gives merchants more granular control. Instead of manually editing a custom Shopify theme every time a campaign changes, you can schedule individual sections and blocks to appear or disappear according to a defined timeline.
In this guide, I will explain how section visibility scheduling works, how to use conditional time-based rules, and how to apply this workflow to improve your conversion rate without constant manual edits.
What You Can Control with Maestro Theme Scheduler
Shopify themes are built from reusable components. A section is a larger area of a page, such as a slideshow, featured collection, or image banner. A block is a smaller content element inside a section, such as a text announcement, button, slide, or promotional card.
Shopify’s section schema documentation explains how developers define sections, blocks, and their settings within a theme.
Maestro lets you schedule changes to these storefront components, including:
-
Promotional banners
- Show a limited-time sale banner when a campaign begins.
- Hide the banner automatically when the promotion ends.
-
Announcement bars
- Replace standard shipping messaging with campaign-specific messaging.
- Schedule delivery deadlines, holiday notices, or launch announcements.
-
Slideshow and carousel blocks
- Display a seasonal slide during a defined date range.
- Remove an outdated campaign slide without rebuilding the entire slideshow.
-
Featured collection sections
- Highlight a holiday collection during a seasonal promotion.
- Return to your standard collection layout after the event.
-
Image and text content blocks
- Schedule campaign-specific creative.
- Coordinate visual content with email, paid advertising, and social media activity.
-
Menus and other theme content
- Plan navigation changes for launches, sales, and seasonal storefront experiences.

Visibility Rules Versus Audience Personalization
The phrase “visibility rules” can describe several different types of storefront logic. It is important to understand what Maestro is designed to control.
Maestro focuses on time-based visibility scheduling. You can define when a section or block should be shown or hidden, including recurring schedules for repeated campaigns.
For example:
- Show a weekend promotion every Friday evening.
- Hide a flash sale banner at the exact campaign end time.
- Display a holiday announcement during a specific date range.
- Schedule a recurring content update every month.
This is different from audience-based personalization, such as:
- Show a block only to customers with a specific tag.
- Display content only to visitors in a certain country.
- Show a promotion based on cart value.
- Display a message only to logged-in customers.
Those requirements typically involve custom Liquid logic, Shopify Functions, customer segmentation, or a specialized personalization app.
It is also different from Shopify’s visible_if setting. Shopify uses visible_if to conditionally display settings inside the theme editor. This helps merchants configure a section more easily, but it does not schedule storefront content for real visitors. Shopify provides more detail about conditional settings in its theme settings documentation.
For campaign scheduling, Maestro’s strength is precise control over what appears, where it appears, and when it changes.
How to Schedule a Section or Block in Maestro
Here are simple steps for creating a visibility schedule.
Step 1: Open Maestro Theme Scheduler
Navigate to Maestro Theme Scheduler from your Shopify Admin. If you have not installed it yet, you can install Maestro from the Shopify App Store.
Before creating a schedule, confirm that you are working in the correct store and review the current theme structure.
Step 2: Select the Theme
Choose the theme that contains the section or block you want to control.
This step is especially important for stores with multiple themes, such as:
- A live production theme.
- A development theme for upcoming changes.
- A seasonal theme.
- A market-specific theme.
Select the appropriate theme, then continue to the scheduling interface.
Step 3: Identify the Section or Block
Open the section and block list to find the storefront component you want to schedule.
Use clear naming conventions in your theme editor whenever possible. For example:
Homepage Flash Sale BannerSummer Collection SpotlightWeekend Free Shipping BarHoliday Gift Guide Slide
Clear names make advanced block control much easier, particularly when a store contains multiple promotional components.
Step 4: Choose the Visibility Action
Define whether Maestro should:
- Show the section or block.
- Hide the section or block.
A simple campaign may use two actions:
- Show the promotional block when the campaign starts.
- Hide the same block when the campaign ends.
This approach helps prevent expired promotions from remaining visible after the offer has finished.
Step 5: Set the Date and Time
Select the start date, start time, and, where applicable, the end date and end time.
Be precise when scheduling:
- Flash sales.
- Product launches.
- Limited inventory announcements.
- Email-driven promotions.
- Paid media campaigns.
- Holiday shipping deadlines.
Confirm the store’s timezone before saving. For international Shopify Plus operations, review whether the schedule should align with your primary store timezone, campaign market, or regional launch strategy.
Step 6: Add Recurrence When Needed
Use recurring schedules for campaigns that repeat regularly.
Examples include:
- A Friday-to-Sunday promotion.
- A weekly “last chance” banner.
- A monthly loyalty message.
- A recurring payday campaign.
- A daily rotating announcement.
Recurring schedules reduce repetitive admin work and help your storefront remain consistent with your marketing calendar.
Step 7: Review and Save
Review the selected theme, section, block, action, timing, and recurrence settings. Then save the schedule.
Shopify will guide you through the theme and storefront environment, while Maestro handles the scheduled visibility change. After completing the setup, preview the relevant page and confirm that the block appears as expected.
Practical Campaign Workflows for Better Conversion Rates
The best use of scheduled visibility is not simply showing more content. It is showing more relevant content at the right moment.
Create a coordinated flash sale experience
Use Maestro to align several storefront elements:
- Show a flash sale announcement bar.
- Display a sale banner on the homepage.
- Feature the sale collection.
- Add a time-sensitive call to action.
- Hide the campaign content when the sale ends.
This creates a more consistent customer journey from landing page to collection page.
Reduce homepage clutter after a campaign
Promotional content can improve urgency during a campaign, but it can also reduce clarity after the offer ends.
Schedule blocks to disappear when they are no longer relevant. This helps you:
- Keep the homepage focused.
- Remove expired messaging.
- Protect visual hierarchy.
- Avoid confusing customers with old offers.
- Maintain a more professional storefront experience.
Match storefront content with email campaigns
Suppose an email campaign launches at 9:00 a.m. Schedule the corresponding homepage block to appear at the same time.
The message customers see after clicking the email should match the promise that encouraged them to visit. Consistent messaging can reduce friction and improve the likelihood that visitors continue toward purchase.
Rotate content for recurring promotions
If your store runs a different promotion every weekend, create a repeatable scheduling framework:
- Prepare the promotional block.
- Define the recurring schedule.
- Confirm the collection and landing page are ready.
- Align the content with your email and advertising calendar.
- Review performance after each cycle.
This process lets your team optimize the campaign without rebuilding the theme every week.
Best Practices for Custom Shopify Themes
Maestro works with Shopify’s theme and section architecture, but every custom Shopify theme is structured differently. Before scheduling critical campaign content, follow these best practices.
Use descriptive section and block names
Avoid generic names such as “Image banner 1” or “Custom block.” Use names that describe the purpose of the content.
This improves collaboration between developers, designers, marketers, and merchandising teams.
Test on a duplicate theme first
For important campaigns, test the schedule on a duplicate or development theme before applying it to the live storefront.
Check:
- Desktop and mobile layouts.
- Section spacing after a block is hidden.
- Buttons and links.
- Collection availability.
- Image loading.
- Promotional copy.
- Theme editor compatibility.
Avoid scheduling incomplete content
A scheduled block should not be the only place where campaign information exists. Confirm that the destination collection, products, discount code, and checkout experience are ready before the block becomes visible.
Record every campaign schedule
Maintain a simple campaign log that includes:
- Campaign name.
- Scheduled theme.
- Section or block name.
- Start and end time.
- Associated discount or collection.
- Marketing channels.
- Performance results.
This is particularly useful for Shopify Plus teams managing multiple markets, brands, or high-volume campaigns.
Measure the Impact on Conversion Rate
Scheduling improves execution, but you still need performance data to understand what works.
Track relevant metrics before and after using scheduled content:
- Conversion rate.
- Add-to-cart rate.
- Click-through rate on promotional blocks.
- Revenue per session.
- Engagement with announcement bars.
- Landing page bounce rate.
- Sales generated during the scheduled period.
Compare similar campaigns where possible. For example, evaluate whether a scheduled homepage banner performs better than a manually updated banner, or whether a focused block produces stronger results than a crowded collection of promotional messages.

When You Need Shopify Plus Development Support
Maestro can remove many manual theme management tasks, but some stores need a broader technical strategy.
Consider working with a Shopify Plus development team when you need:
- Custom section architecture.
- Complex block relationships.
- Market-specific storefront logic.
- Custom Liquid visibility conditions.
- Advanced app integrations.
- Performance optimization.
- Conversion-focused theme testing.
- Multiple campaign environments.
- Large-scale theme migration or refactoring.
At XCO Agency, we create custom Shopify store experiences focused on usability, performance, and conversion. Our Shopify design services include custom store design, theme customization, responsive UX, conversion optimization, and ongoing support.
Final Thoughts
Granular storefront control is a vital step for merchants who want to run more campaigns without creating more manual work. With Maestro Theme Scheduler, you can schedule individual sections and blocks, coordinate content with your marketing calendar, and automatically remove outdated promotions.
The most effective strategy is to treat scheduled visibility as part of your conversion optimization process. Plan the customer journey, show relevant content at the right time, remove distractions when the campaign ends, and measure the result.
That proactive step can help your team move faster while keeping your Shopify store accurate, polished, and ready for every promotion.
Install Maestro Theme Scheduler from the Shopify App Store, or book a consultation with XCO Agency to discuss custom Shopify themes and Shopify Plus development.