
As a Shopify expert, I often work with high-growth merchants who feel paralyzed by the technical complexity of international expansion. They are seeking a streamlined way to reach global customers without the administrative nightmare of managing multiple independent store instances. Shopify Markets is the solution to this friction, providing a centralized hub to manage localized shopping experiences across the globe.
In the past, going global meant either a single, generic store that converted poorly or a complex multi-store setup that doubled your workload. Shopify Markets changes the narrative by allowing you to tailor pricing, language, and domains for specific regions all within your existing admin. However, the sheer number of options can be overwhelming. This guide focuses on the critical first steps to ensure your international launch is professional, compliant, and optimized for conversion.
Why Shopify Markets is Essential for Growth
Before diving into the setup, it is vital to understand why this tool is a game-changer for your brand. High-growth merchants prioritize efficiency and customer experience. Shopify Markets delivers on both fronts by offering these key advantages:
- Unified Inventory Management: Keep your stock levels synced across all regions without third-party connectors.
- Localized Pricing and Currency: Increase trust by showing customers prices in their native currency with rounding rules that look professional.
- Language Localization: Speak directly to your audience by offering translated versions of your store.
- Customized Domain Strategies: Use subfolders or subdomains to improve local SEO rankings.
- Streamlined Duties and Taxes: Avoid "sticker shock" at delivery by calculating and collecting duties at checkout.
Step 1: Accessing the Markets Dashboard
The very first action you must take is to locate the Markets interface. Shopify has integrated this deeply into the settings, making it the command center for your global operations.
- Log in to your Shopify Admin dashboard.
- Navigate to the search bar at the top of the screen.
- Type "Markets" and select the option that appears under settings.
- Alternatively, click on the Settings gear icon in the bottom left and select Markets from the sidebar menu.
Once you arrive at this screen, you will see your Primary Market. By default, this is usually the country where your business is legally registered. Before adding new regions, ensure your primary market settings are perfect, as these serve as the template for your expansion.

Step 2: Audit Your Primary Market and Domain
Before you invite the world to your store, your foundation must be rock-solid. A common mistake is expanding with a domain that is not optimized or a site that lacks basic usability features.
- Domain Impact: Ensure your domain is configured for maximum impact. A clean, professional URL structure builds immediate credibility. You can learn more about this in our guide on how to perfectly set up your domain for maximum impact.
- Usability Audit: If your store has high bounce rates in your home country, those issues will only magnify in international markets. Consider a UX and conversion rate optimization audit to identify friction points before you spend money on international traffic.
Step 3: Adding Your First Expansion Market
Once your primary market is verified, it is time to add your first international target. I recommend starting with a single country or a small, similar region (like the Eurozone) rather than trying to launch in 50 countries at once.
- Click the Add Market button in the top right corner of the Markets dashboard.
- Assign a name to the market. This is for your internal reference only, so name it clearly, such as "European Union" or "UK Expansion."
- Search for the countries or regions you wish to include in this specific market.
- Click Add Market to save your selection.
After creating the market, it will initially be in a "Preview" or "Inactive" state. This gives you the opportunity to configure the localized settings without the public seeing an unfinished experience.
Step 4: Configure Localized Pricing and Currency
One of the most significant barriers to international sales is currency confusion. If a customer in London sees a price in USD, they are far more likely to abandon their cart.
- Select Your Currency: Within your new market settings, navigate to the Pricing section. Shopify allows you to set prices to convert automatically based on exchange rates or to set manual prices for specific products.
- Implement Rounding Rules: To maintain a professional brand image, enable rounding. Instead of a price appearing as £14.32, you can set it to round to the nearest £0.99 or £1.00.
- Price Adjustments: You may need to increase prices by a percentage for certain markets to cover higher shipping costs or international marketing expenses. Shopify Markets makes this a simple toggle.

Step 5: Set Up Your International Domain Strategy
How your URL appears to international customers affects both trust and SEO. You have three main options for your international domain structure:
- Subfolders (e.g., xco.agency/en-gb): This is often the best choice for SEO because it keeps all your "domain authority" in one place. It is easy to set up and requires no extra SSL certificates.
- Subdomains (e.g., uk.xco.agency): Good for brands that want a clear separation between regions but still want to stay under one main brand name.
- Top-Level Domains (e.g., xco.co.uk): This offers the highest level of local trust but is the most difficult to manage and requires purchasing multiple domains.
For most high-growth merchants using Shopify Markets, subfolders are the most efficient starting point. Navigate to the Domains and Subfolders section within your market settings to choose your preference.
Step 6: Automating Your Regional Strategy
As you expand into different time zones, managing promotions and theme updates manually becomes impossible. This is where strategic automation is vital. If you are running a "Bank Holiday" sale in the UK but your US store should remain at full price, you need a way to schedule these changes.
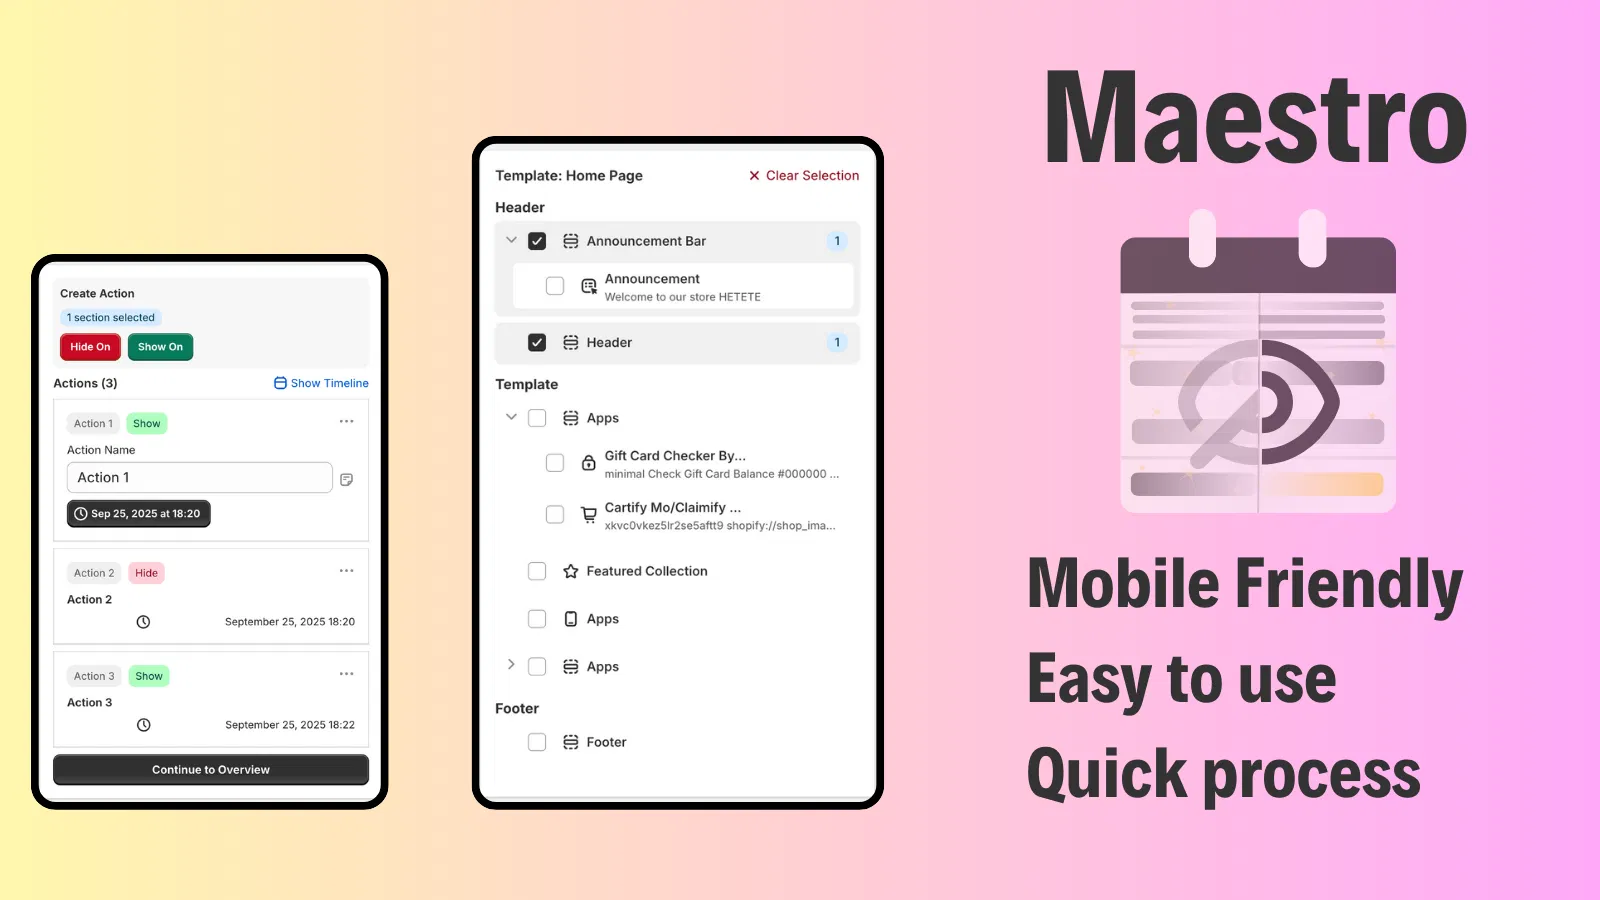
At XCO Agency, we recommend using tools like Maestro Theme Scheduler to automate your localized content. You can schedule specific theme sections to appear or disappear at precise times in specific markets.
- Scheduled Promotions: Use Maestro Products Scheduler to launch new collections at midnight in the local time zone of your market.
- Theme Visibility: Hide or show specific banners depending on the region. For example, show a "Free Shipping to France" banner only to your European Market.
- Inventory Automation: Ensure that products only available in certain warehouses are correctly tagged and scheduled for the appropriate markets.
Step 7: Address Duties and Import Taxes
Nothing kills brand loyalty faster than a customer receiving a surprise bill from a courier for import duties. Shopify Markets allows you to handle this proactively.
- Navigate to Duties and Import Taxes: Within your market settings, click on the duties section.
- Enable Duty Collection: If you are on a compatible Shopify plan, you can estimate and collect duties at checkout. This provides the customer with a "Landed Cost," meaning they pay everything upfront and face no surprises at their door.
- Tax Compliance: Ensure your VAT or GST settings are correctly configured for the destination country.
Refining the Customer Experience
Beyond the technical setup, consider the small details that enhance usability. For instance, if you are selling in a market with strict legal requirements, you might need to show an "I agree with terms and conditions" checkbox on the cart page.
You should also look into personalizing the post-purchase experience. Using an app like Claimify can help you manage warranties and digital registrations globally, ensuring that your international customers feel as supported as your local ones.
Finalizing and Going Live
Once you have configured your pricing, domains, and duties, it is time to flip the switch.
- Review your market settings one last time.
- Click on the Market Status toggle and set it to Active.
- Test the experience by using a VPN or the Shopify localized preview tool to ensure prices and languages appear as expected.
Summary of the Quick-Start Process
Setting up Shopify Markets is a proactive step toward becoming a truly global brand. By following these steps, you move from a domestic seller to an international powerhouse:
- Access the dashboard via settings to understand your current footprint.
- Define your expansion market starting with one high-potential region.
- Localize the financials by setting currencies and rounding rules.
- Optimize the URL structure using subfolders for better SEO.
- Automate your workflow with Maestro to manage time-zone-specific launches.
- Ensure transparency by calculating duties and taxes at checkout.
As a Shopify expert, I can tell you that the merchants who succeed in global trade are those who prioritize the local customer experience from day one. Shopify Markets provides the infrastructure, but your strategy and attention to detail provide the growth.
If you are looking to scale your Shopify Plus store or need a custom strategy for your international expansion, XCO Agency is here to help. Whether it is through advanced automation or a full technical audit, we ensure your store is built for the global stage.
