
As a Shopify expert, I often work with merchants who are exhausted by the "midnight launch" cycle. They stay up late to hit "Publish" on a new theme for a Black Friday sale, or they set early alarms to ensure a promotional banner disappears the moment a discount ends. This manual approach is not only taxing for your team but also opens the door to significant human error.
In the high-stakes world of ecommerce, your storefront is your most valuable asset. When you are managing custom Shopify themes or complex multi-market setups, you need a level of precision that manual updates simply cannot provide. Merchants seeking to scale their operations are moving away from manual interventions and toward robust automation. This is where the Maestro Theme Scheduler becomes a vital tool in your tech stack.
Maestro is designed to offer a "set it and forget it" solution for theme management. Whether you are running a flash sale, launching a new seasonal collection, or performing routine ecommerce maintenance services, this app ensures your store looks exactly how it should, exactly when it should.
In this guide, I will walk you through the essential first steps to get Maestro up and running so you can reclaim your time and optimize your store performance.
The High Cost of Manual Store Updates
Before we dive into the "how-to," it is important to understand why this automation is a necessity for modern brands. Many store owners underestimate the impact of delayed or incorrect theme publishing.
- Lost Revenue: If a promotional banner stays up after the sale ends, you face customer frustration and potential legal issues regarding pricing.
- Brand Inconsistency: Manual updates often lead to "broken" layouts where a section is updated but the corresponding block is not, leading to a poor user experience.
- Team Burnout: Requiring developers or marketing managers to work outside of standard hours for site updates is unsustainable and leads to high turnover.
- Limited Agility: Without scheduling, you are limited by your team’s availability. With automation, you can run global campaigns across different time zones effortlessly.
By implementing automated scheduling, you ensure that your Shopify Plus development efforts are fully leveraged, allowing for sophisticated, timed content releases that keep your brand fresh and relevant.
Getting Started: Your First 5 Minutes with Maestro
Setting up Maestro is a straightforward process, but doing it correctly the first time will save you hours of troubleshooting later. Here are the simple steps to get the app integrated into your workflow.
Step 1: Installation and Dashboard Access
Navigate to the Shopify App Store and search for "Maestro Theme Scheduler." Once you click "Install Now," the app will integrate with your Shopify Admin.
After installation, you can access the dashboard by navigating to the "Apps" section in your Shopify sidebar and selecting Maestro Theme Scheduler. The dashboard is designed to be intuitive, giving you a bird's-eye view of your current and upcoming schedules.

Step 2: Selecting Your Theme for Automation
The first active step in the app is to identify which theme you want to manage. Most merchants have a "Live" theme and several "Draft" themes for upcoming events.
- Navigate to "Schedule Content": Click this button on the left-side menu or the top-right of the dashboard.
- Choose Your Target: You will see a list of all themes currently in your Shopify admin. Select the theme you have been working on for your next campaign.
- Resync if Necessary: If you recently added a new theme and it doesn't appear, use the "Resync" button to refresh the list.
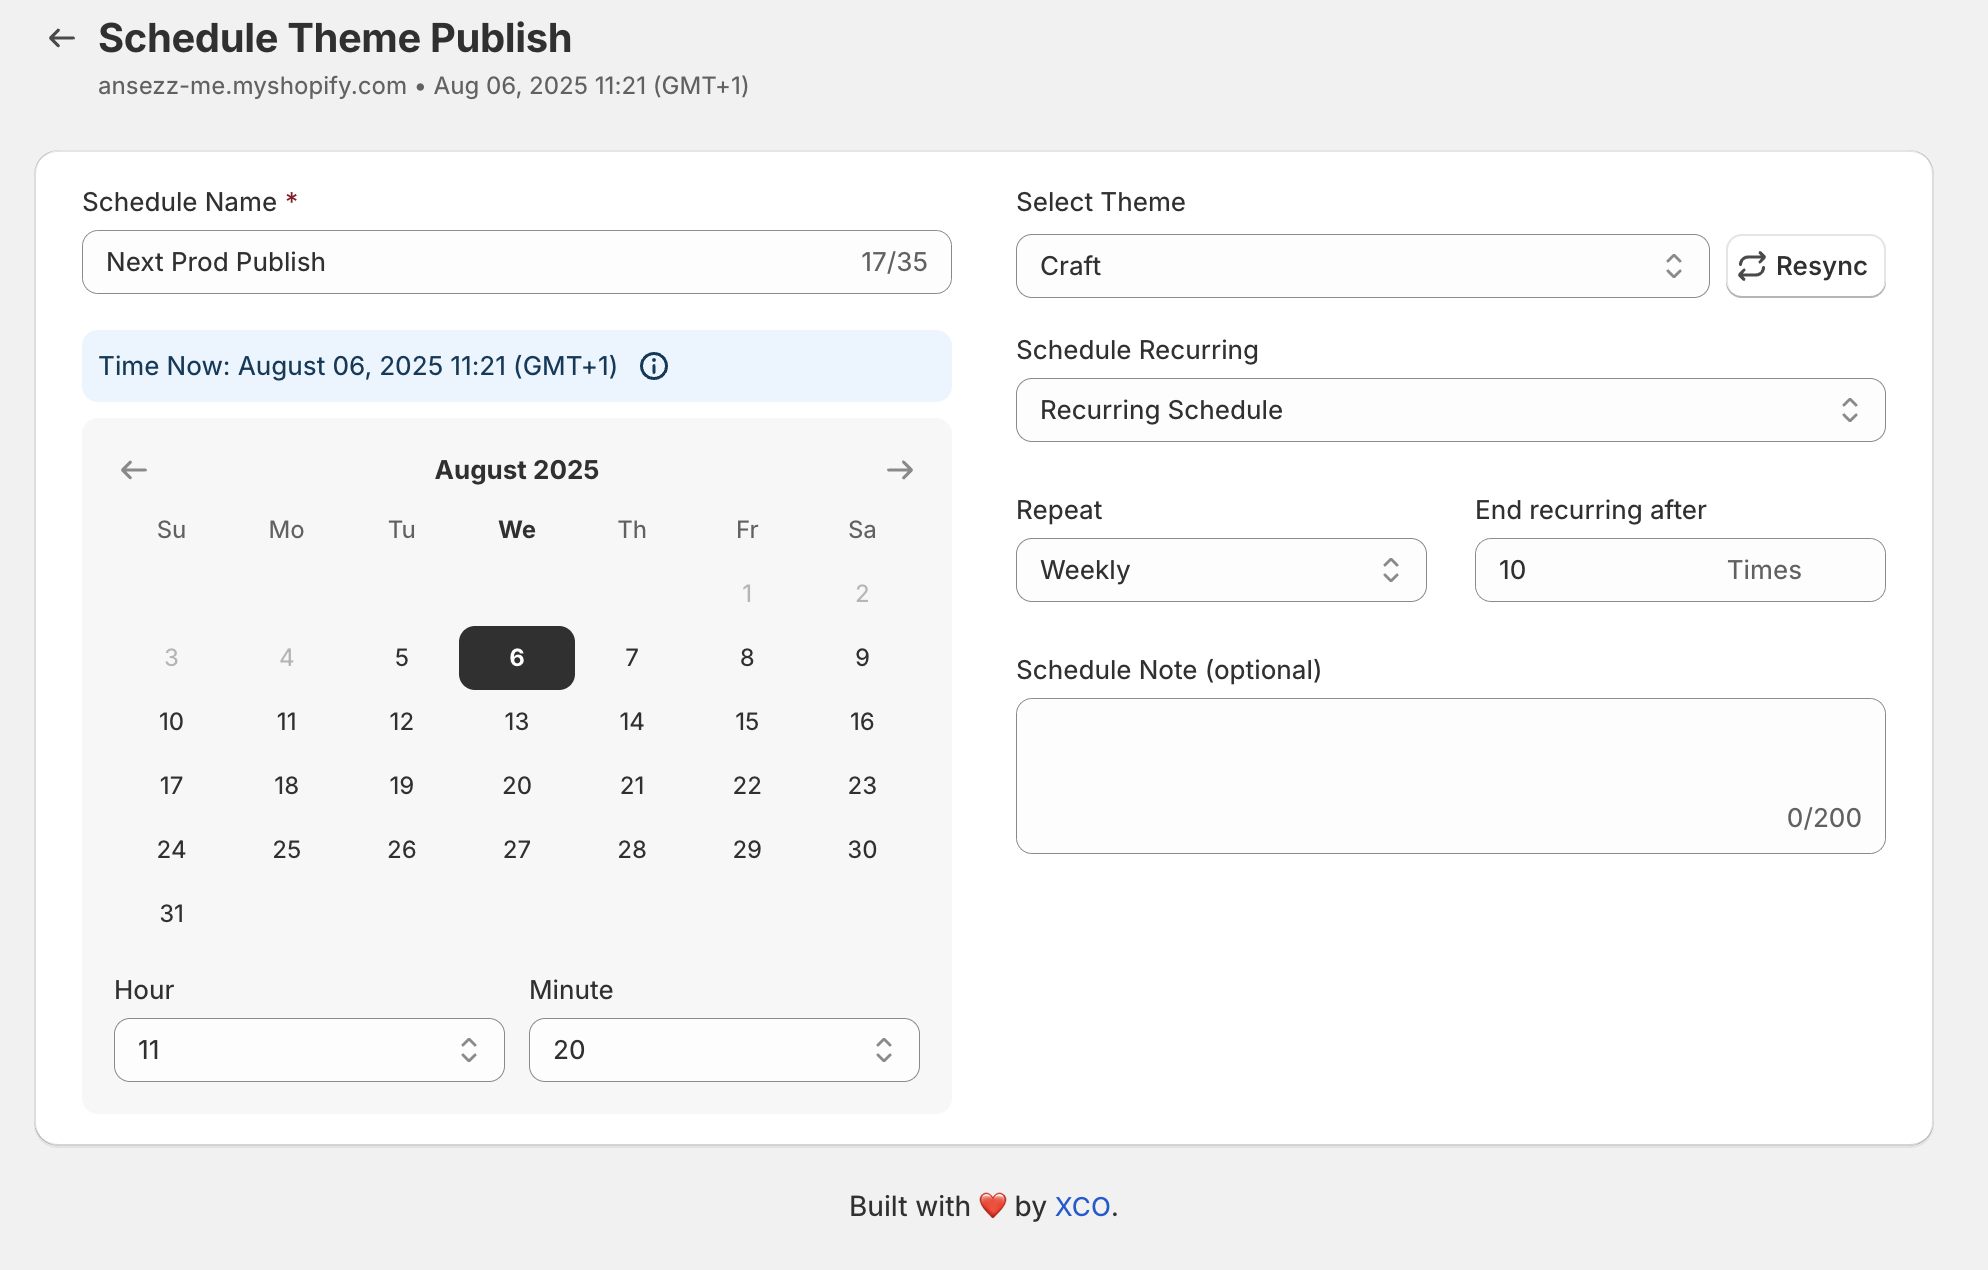
Step 3: Setting Your First Schedule Date
Once you have selected your theme, you need to define the "when."
- Select the Date and Time: Use the calendar picker to choose the exact moment the theme should go live.
- Time Zone Awareness: Ensure your store's time zone settings match your intended launch time. Maestro will guide you through this to avoid any regional discrepancies.
- Add Notes: I highly recommend adding a brief note like "Launch of Summer Collection" or "Holiday Header Update." This makes it much easier to manage your timeline when you have multiple schedules running simultaneously.
Mastering Content Visibility: Sections and Blocks
One of the most powerful features of Maestro, which sets it apart from basic theme schedulers, is the ability to control specific sections and blocks within a theme. You don't always want to swap an entire theme; often, you just need to hide a "Limited Time Offer" banner or show a "New Arrival" section.
Granular Control Over Custom Shopify Themes
For brands using custom Shopify themes, maintaining the integrity of the design while changing content is crucial. Maestro allows you to:
- Toggle Visibility: You can set a specific section (like a hero image or a video background) to become visible at 8:00 AM and hidden at midnight.
- Manage Blocks: If you have a multi-column section, you can schedule individual blocks within that section to appear or disappear. This is perfect for highlighting different products throughout a multi-day sale.
- Template Specificity: You can choose to apply these changes across specific templates, such as the homepage, product pages, or collection pages.
Strategic Automation: Recurring Schedules and Rollbacks
Once you are comfortable with basic scheduling, you can begin to use Maestro’s more advanced features to power-up your growth strategies.
Implementing Recurring Schedules
If you run weekly promotions, such as "Two-for-Tuesday" or weekend flash sales, you do not need to create a new schedule every week.
- Click "ADD repeat": Inside the schedule settings, you can select the frequency.
- Choose Frequency: Options include daily or weekly.
- Set the Cycle: You can specify how many times the schedule should repeat (e.g., for 10 weeks) or set it to run indefinitely.
This feature is a game-changer for ecommerce maintenance services. It ensures that your recurring marketing efforts are automated, reducing the administrative burden on your team.
The Power of the Rollback
A common mistake in ecommerce is forgetting to revert the site to its original state after a sale. Maestro solves this with the rollback option. When you schedule a theme or section to go live, you should immediately schedule a "revert" action.
- Clone the Schedule: Use the clone icon to create a duplicate of your launch schedule.
- Inverse the Action: If the first schedule was "Show Section," set the second schedule to "Hide Section."
- Set the End Time: Choose the exact time the promotion expires.
This ensures a seamless transition back to your evergreen content without any manual intervention.
Why Shopify Plus Merchants Need Scheduled Automation
For those involved in Shopify Plus development, the complexity of managing multiple stores and high-volume traffic requires enterprise-level tools.
Shopify Plus merchants often deal with international markets and localized content. While Shopify’s native "Schedule Theme" feature exists, it is limited. Maestro provides the granular, section-level control that high-growth brands need to stay competitive. It allows for a more sophisticated approach to "Merchandising on Autopilot."
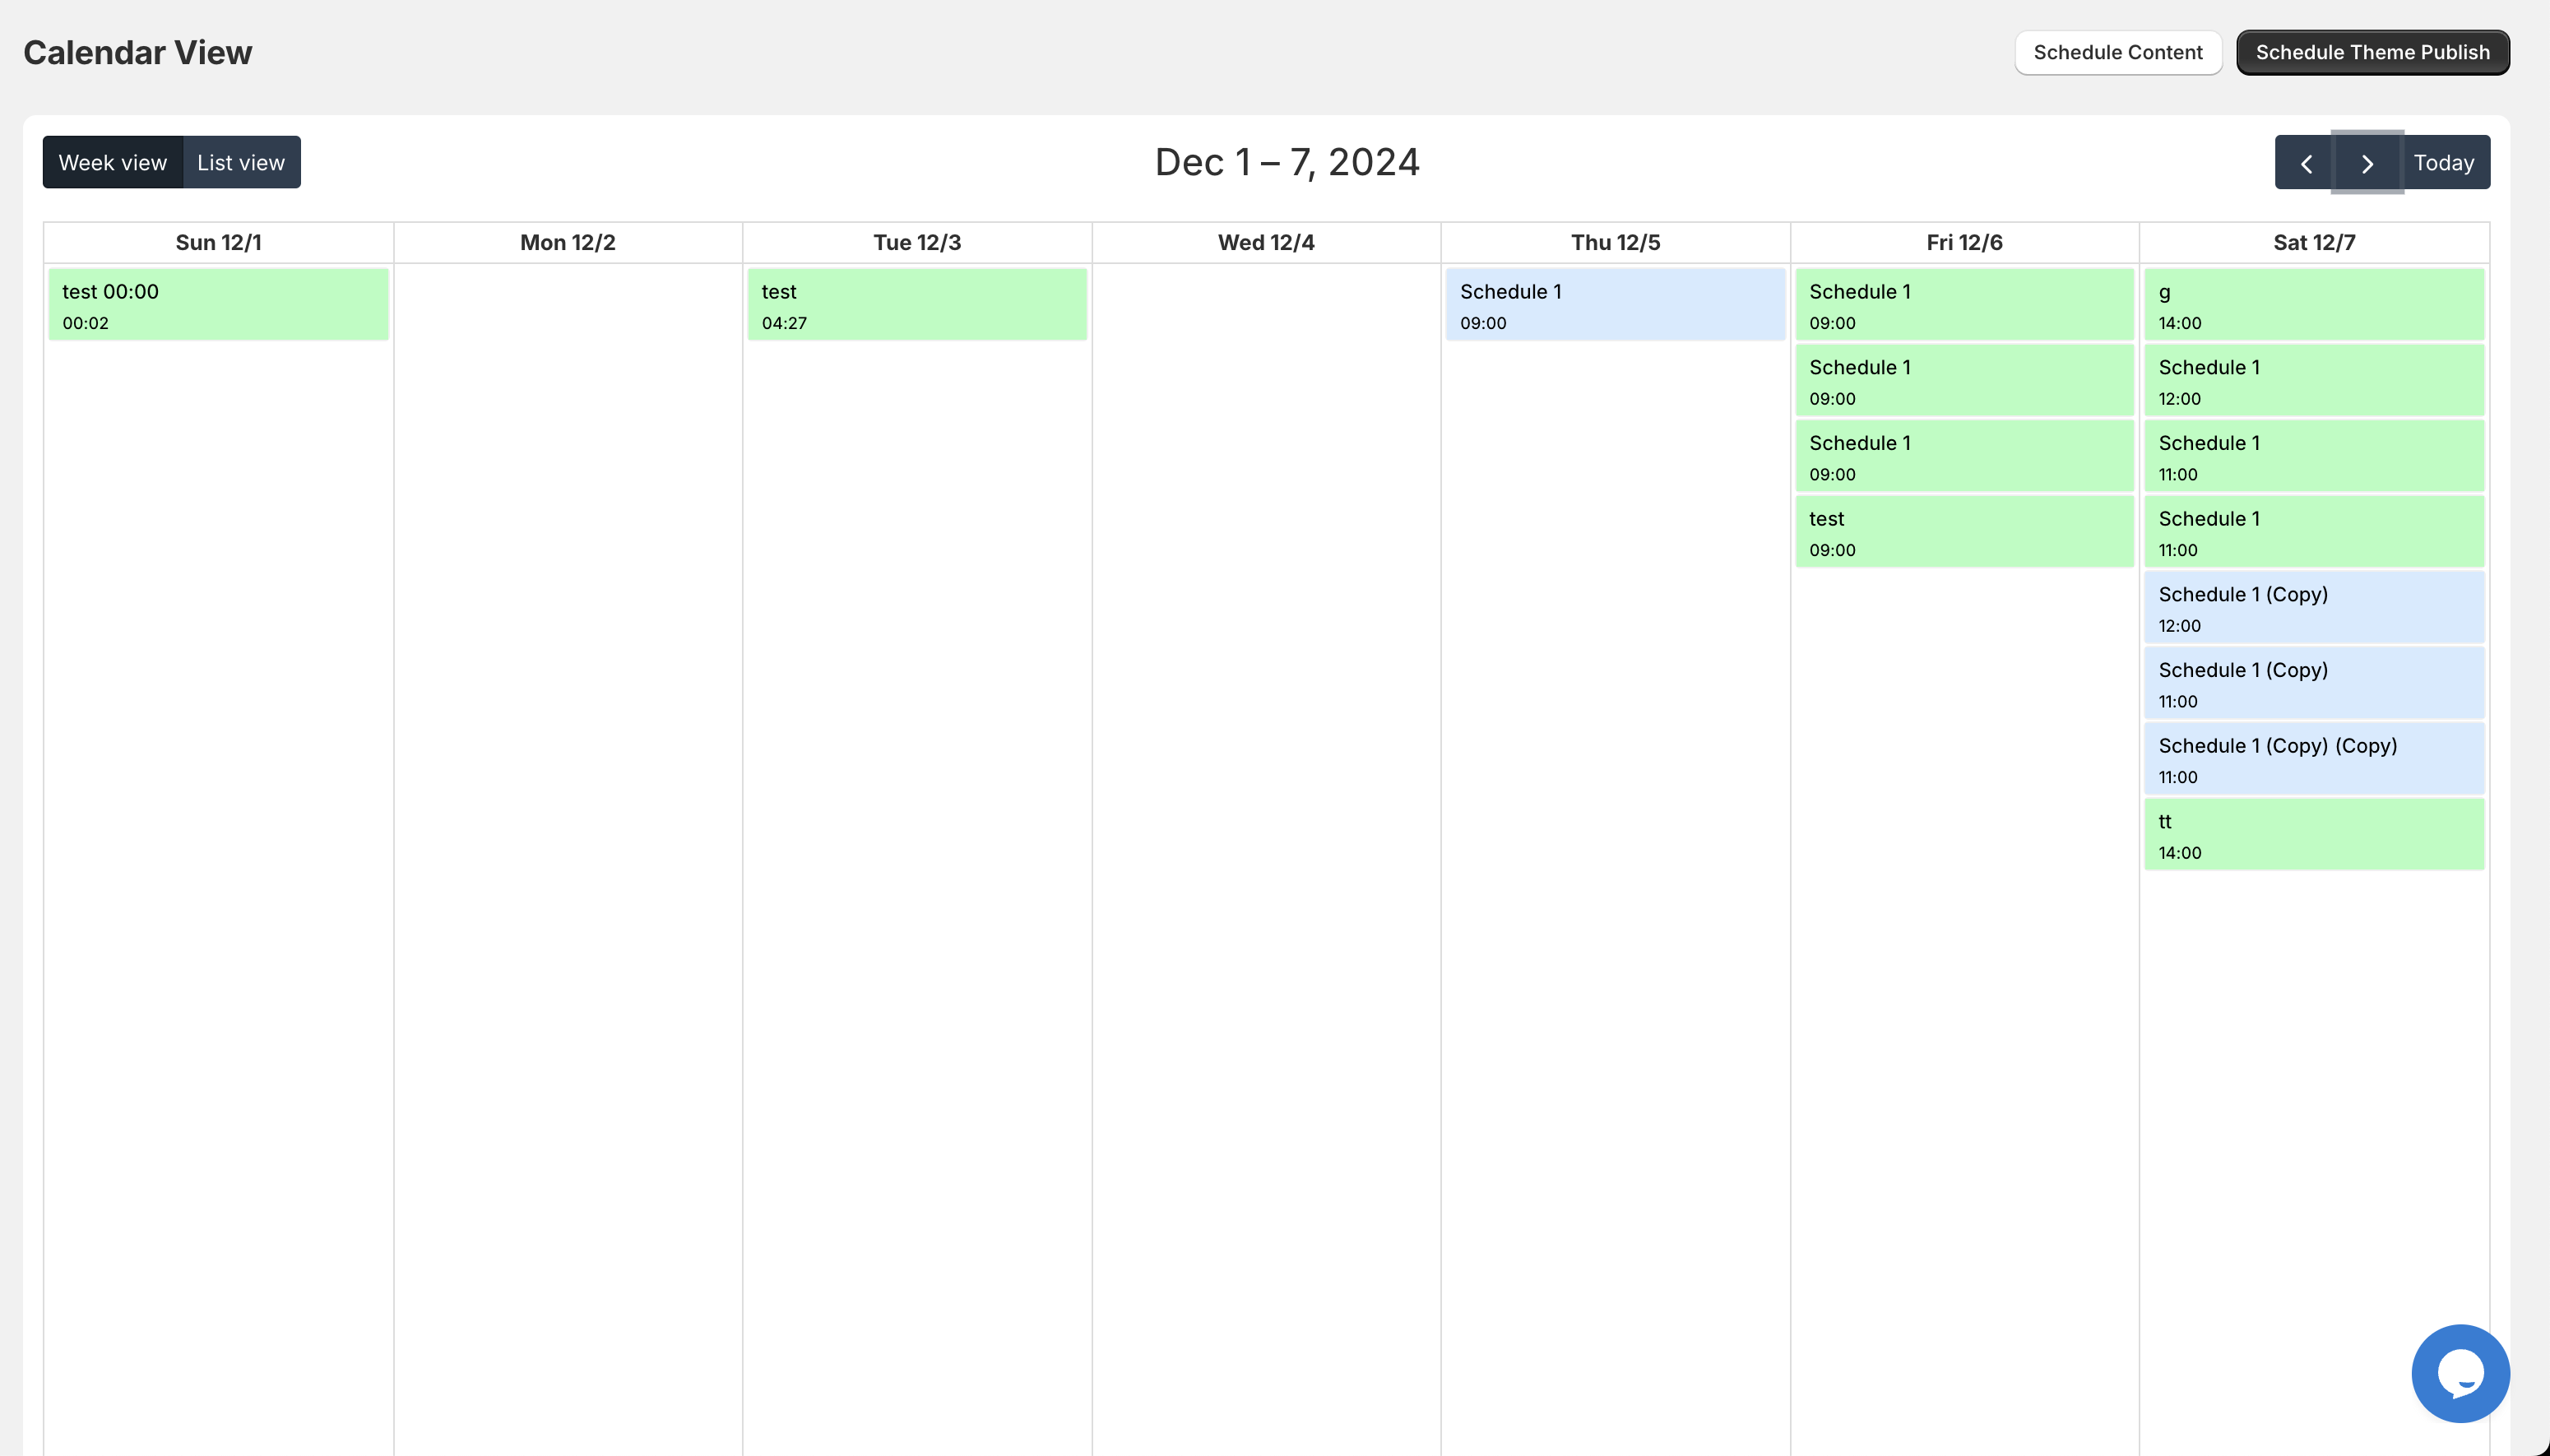
Benefits for Large Teams
- Accountability: The timeline view shows exactly who scheduled what and when it happened.
- Centralized Control: Manage updates across various parts of the site from a single panel.
- Reduced Risk: Automated updates reduce the risk of a "broken" site during peak traffic periods when every second of downtime equals lost revenue.

Elevating Your Ecommerce Maintenance Services
As an agency or an in-house lead, your goal is to optimize the store’s performance while keeping costs low. Manual site management is an "invisible cost" that eats into your margins.
By integrating Maestro into your ecommerce maintenance services, you provide a higher level of value to the business. You transition from being a "reactive" team that fixes things when they break to a "proactive" team that builds robust systems for growth.
Here are a few ways to use Maestro for ongoing maintenance:
- Seasonal Refreshes: Schedule your header and footer changes for every season months in advance.
- Inventory Shifts: If you know a shipment is arriving on a certain date, schedule the "Back in Stock" sections to go live automatically.
- System Testing: Use scheduled themes to test new features or layouts during low-traffic periods before making them permanent.
Conclusion
Taking the proactive step to automate your Shopify theme management is a vital move for any serious merchant. The "midnight launch" should be a thing of the past. By following this quick-start guide, you can ensure that your custom Shopify themes are always up to date, your promotions are perfectly timed, and your team is focused on high-level strategy rather than manual clicks.
Maestro Theme Scheduler is more than just a calendar tool; it is a fundamental part of an efficient ecommerce operation. It provides the reliability that Shopify Plus development demands and the ease of use that every store owner seeks.
If you are ready to stop worrying about your next site update and start focusing on scaling your brand, now is the time to implement these steps. After completing your first schedule, you will quickly see how much mental energy and time you save.
Are you looking to optimize your store further or need expert help with your Shopify setup? Explore our Shopify design services or book a meeting with our team at XCO Agency today. We specialize in helping brands like yours master the art of automated ecommerce growth. For more information on the app specifically, visit the Maestro Theme Scheduler page.