
As a Shopify expert, I often see merchants who have built incredible storefronts, sourced amazing products, and perfected their ad copy, only to let the entire customer experience crumble the moment someone asks for a return. They treat returns as a failure of the sale rather than a vital part of the customer lifecycle. Most store owners I work with are seeking a way to escape the "Return Email Hell" where support tickets are buried under a mountain of "Where is my refund?" and "Can I exchange this for a large?" requests.
In the world of enterprise ecommerce solutions, efficiency is the only way to scale. If your team is manually checking order dates, verifying items, and emailing return labels, you are wasting valuable hours that should be spent on growth. Setting up an automated returns portal is the single most effective way to optimize your store setup, and believe it or not, it takes less time than your morning coffee break.
Why Your Current Manual Process is Killing Your Growth
Before we dive into the how, let's talk about the why. Many merchants believe that making returns a little difficult will discourage customers from sending items back. This is a dangerous myth. In reality, a difficult return process just ensures that the customer never buys from you again.
When you implement a solution like Claimify ‑ Support & Claims, you are not just making life easier for your team; you are building massive trust with your audience. Here are a few reasons why automation is non-negotiable:
- Customer Autonomy: Modern shoppers want to solve their own problems without waiting 24 to 48 hours for an email response.
- Reduced Support Volume: Moving requests from a messy inbox to a portal can reduce support tickets by up to 60 percent.
- Data Accuracy: Manual entry leads to mistakes. Automated portals pull data directly from the Shopify order history, ensuring the right item is being returned for the right reason.
- Brand Consistency: A professional portal looks like an extension of your store, unlike a back-and-forth chain of plain-text emails.
The 5-Minute Setup: Transforming Your Storefront
Setting up an automated portal does not require a developer or a week of configuration. With the right tools and a clear plan, you can have a fully functional system live before your next meeting. As part of our ecommerce maintenance services at XCO Agency, we recommend this streamlined approach for every Shopify Plus and standard merchant we partner with.
Step 1: Install and Connect Your Solution
Navigate to the Shopify App Store and install a dedicated claims management tool like Claimify. Once installed, the app will sync with your existing order database. This is the foundation of your portal; it allows the system to recognize customer emails and order numbers instantly.
Step 2: Define Your Validation Rules
This is where the "automated" part of an automated returns portal really shines. You do not want to approve every single request manually, but you also do not want to approve things that violate your policy. You should set clear rules within the dashboard:
- The Return Window: Set a hard limit, such as 30 days after delivery, after which the portal will automatically decline a request.
- Item Eligibility: Mark specific collections or tags, like "Final Sale" or "Underwear," as non-returnable.
- Condition Requirements: Require the customer to upload photos for "Damaged" or "Warranty" claims before the request can proceed.

Step 3: Brand the Portal Interface
Your returns portal should not look like a generic third-party site. Use the customization settings to upload your logo, choose your brand colors, and match the fonts. A seamless transition from your storefront to the return portal keeps the customer in your brand ecosystem, which is a key component of high-end enterprise ecommerce solutions.
Step 4: Integrate into the Storefront and Thank-You Page
One of the most powerful features of a modern returns setup is accessibility. Do not hide your return link in a tiny font in your footer.
- The Footer: Add a clear "Start a Return or Claim" link in your main navigation or footer.
- The Thank-You Page: Use the Shopify order status page to show a button for future claims.
- Customer Accounts: Ensure the portal link is visible within the customer’s "My Orders" section.
Step 5: Activate the Unified Dashboard
Once the portal is live, stop checking your support email for return requests. Redirect all manual inquiries to the portal. This moves every request into a single, unified dashboard where your team can see the status of every refund, exchange, and warranty claim at a glance.
Moving from Messy Inboxes to a Unified Dashboard
The biggest bottleneck in ecommerce maintenance services is the fragmentation of data. When a customer emails you about a broken item, your support agent has to find the order in Shopify, check the shipping date in your carrier app, and then look at the email attachment of the photo.
By using a tool like Claimify, all of that information is centralized. When a customer files a claim, the photo they took is attached to the specific order line item in your dashboard. You can see the order value, the customer’s lifetime spend, and the reason for the claim in one view.
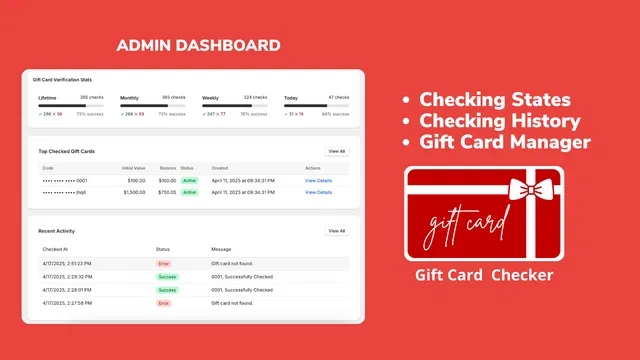
Visualizing your activity in a centralized dashboard allows for faster decision-making and better resource allocation.
As a Shopify expert, I find that this level of organization is what separates hobbyist stores from professional brands. It allows you to spot patterns. If you notice a high volume of returns for "Product not as described" on a specific SKU, you know you need to update your product descriptions or photography. This is proactive maintenance that saves you thousands in the long run.
The Power of Automated Validation Rules
The secret to a 5-minute setup that actually works is the logic behind the portal. You do not want to be a bottleneck for your own business. Automated validation rules allow you to set your policy once and let the software enforce it.
For example, you can set a rule that automatically approves an exchange for a different size of the same item if the request is made within 14 days and the item is in stock. This happens instantly. The customer gets their new shipping label, the inventory is reserved, and you did not have to lift a finger.
For more complex issues, like warranty claims, the system can act as a filter. Instead of an agent asking "Can you send a photo of the serial number?" the portal requires that photo before the "Submit" button even becomes clickable. This ensures that every ticket landing in your dashboard is "action-ready."
Elevating the Post-Purchase Experience
The period between a customer clicking "Buy" and receiving their refund or exchange is the most sensitive time in the customer journey. If they feel ignored, they will file a chargeback. If they feel supported, they will return to shop again.
A self-service portal provides instant gratification. The moment they submit a claim, they receive a confirmation. They can track the progress of their return just like they tracked the original shipment. This transparency reduces anxiety and eliminates the need for "follow-up" emails that clog your system.
If you are looking to scale, you should also consider how your portal handles exchanges. Encouraging an exchange over a refund is the best way to retain revenue. A smart portal can suggest similar items or offer a "bonus" store credit if the customer chooses a gift card instead of a refund to their original payment method.

Conclusion: A Vital Step for Modern Merchants
In the fast-paced world of ecommerce, you cannot afford to be slowed down by manual administrative tasks. Setting up an automated returns portal is not just a "nice-to-have" feature; it is a vital step for anyone serious about enterprise ecommerce solutions. By spending five minutes today to configure a tool like Claimify, you are reclaiming hours of your time every single week.
You are moving away from the chaos of messy email inboxes and toward a professional, unified dashboard that improves both your team’s efficiency and your customer’s trust. If your Shopify store setup still relies on "Email us to start a return," you are leaving money on the table and risking your brand reputation.
Ready to professionalize your support and claims process? It is time to stop the manual madness. If you need help optimizing your store for high-volume growth or want to explore more advanced automation, we are here to help.
Explore how Claimify can transform your store: Visit Claimify
Looking for expert guidance on your Shopify setup? Book a meeting with our team or Contact XCO Agency today.