
As a Shopify expert, I often speak with merchants who are exhausted by the manual labor involved in maintaining a modern storefront. Whether it is staying up until midnight to launch a Black Friday sale or waking up at the crack of dawn to revert a homepage banner after a flash sale ends, the "manual" way of managing a store is neither scalable nor sustainable. In the fast paced world of e-commerce, timing is everything, and even a ten minute delay in updating your site can lead to lost revenue or customer confusion.
Most high growth brands are seeking a way to streamline their operations. They want to focus on growth and strategy rather than the repetitive tasks of clicking "Publish" on a theme at a specific second. This is where automation becomes a competitive advantage. By leveraging the right tools, you can transform your workflow from reactive to proactive, ensuring your store is always aligned with your marketing calendar without the need for constant manual intervention.
Why Automate Your Shopify Storefront Changes?
Before we dive into the technical "how," it is vital to understand the "why." Automating your storefront changes is not just about saving a few minutes of work. It is about operational excellence and risk mitigation. For brands investing in custom shopify themes or complex shopify plus development, automation ensures that your high end design and functionality are presented to the user at the exact right moment.
Here are the primary advantages of automating your storefront updates:
- Eliminate Human Error: Manual updates are prone to mistakes, such as forgetting to toggle a section or accidentally publishing the wrong version of a theme during a high pressure launch.
- Reclaim Your Time: Automation allows your team to focus on high impact activities like conversion rate optimization and customer acquisition instead of site maintenance.
- Consistency Across Time Zones: If you serve a global audience, automation ensures your promotions go live at the optimal time for every market, regardless of your local time.
- Enhanced Agility: You can plan and schedule weeks or months of promotions in advance, allowing for a more organized and strategic approach to your marketing calendar.
- Professionalism: Seamless transitions between seasonal themes and promotional banners provide a polished experience that builds trust with your customers.
The 5 Minute Solution: Maestro Theme Scheduler
If you are looking for a "set it and forget it" solution, the Maestro Theme Scheduler is designed specifically for this purpose. While Shopify offers some native scheduling features, they often lack the granularity and reliability required by Shopify Plus merchants and growing brands. Maestro bridges this gap by providing a centralized hub for all your storefront scheduling needs.
Maestro allows you to automate everything from full theme publishes to the visibility of specific sections and blocks within your templates. This means you can have your Christmas theme go live on December 1st and automatically revert to your standard brand theme on December 26th without ever logging into the admin during the holidays.
How to Set Up Your First Automation in 5 Minutes
Setting up an automated change does not require a developer or a long technical manual. By following these simple steps, you can have your first scheduled task running in less time than it takes to brew a cup of coffee.
Step 1: Install and Connect Maestro
Navigate to the Shopify App Store and install the Maestro Theme Scheduler. Once installed, the app will sync with your existing library of custom shopify themes. Ensure you have the themes you wish to schedule already prepared in your "Theme Library" section within the Shopify Admin.
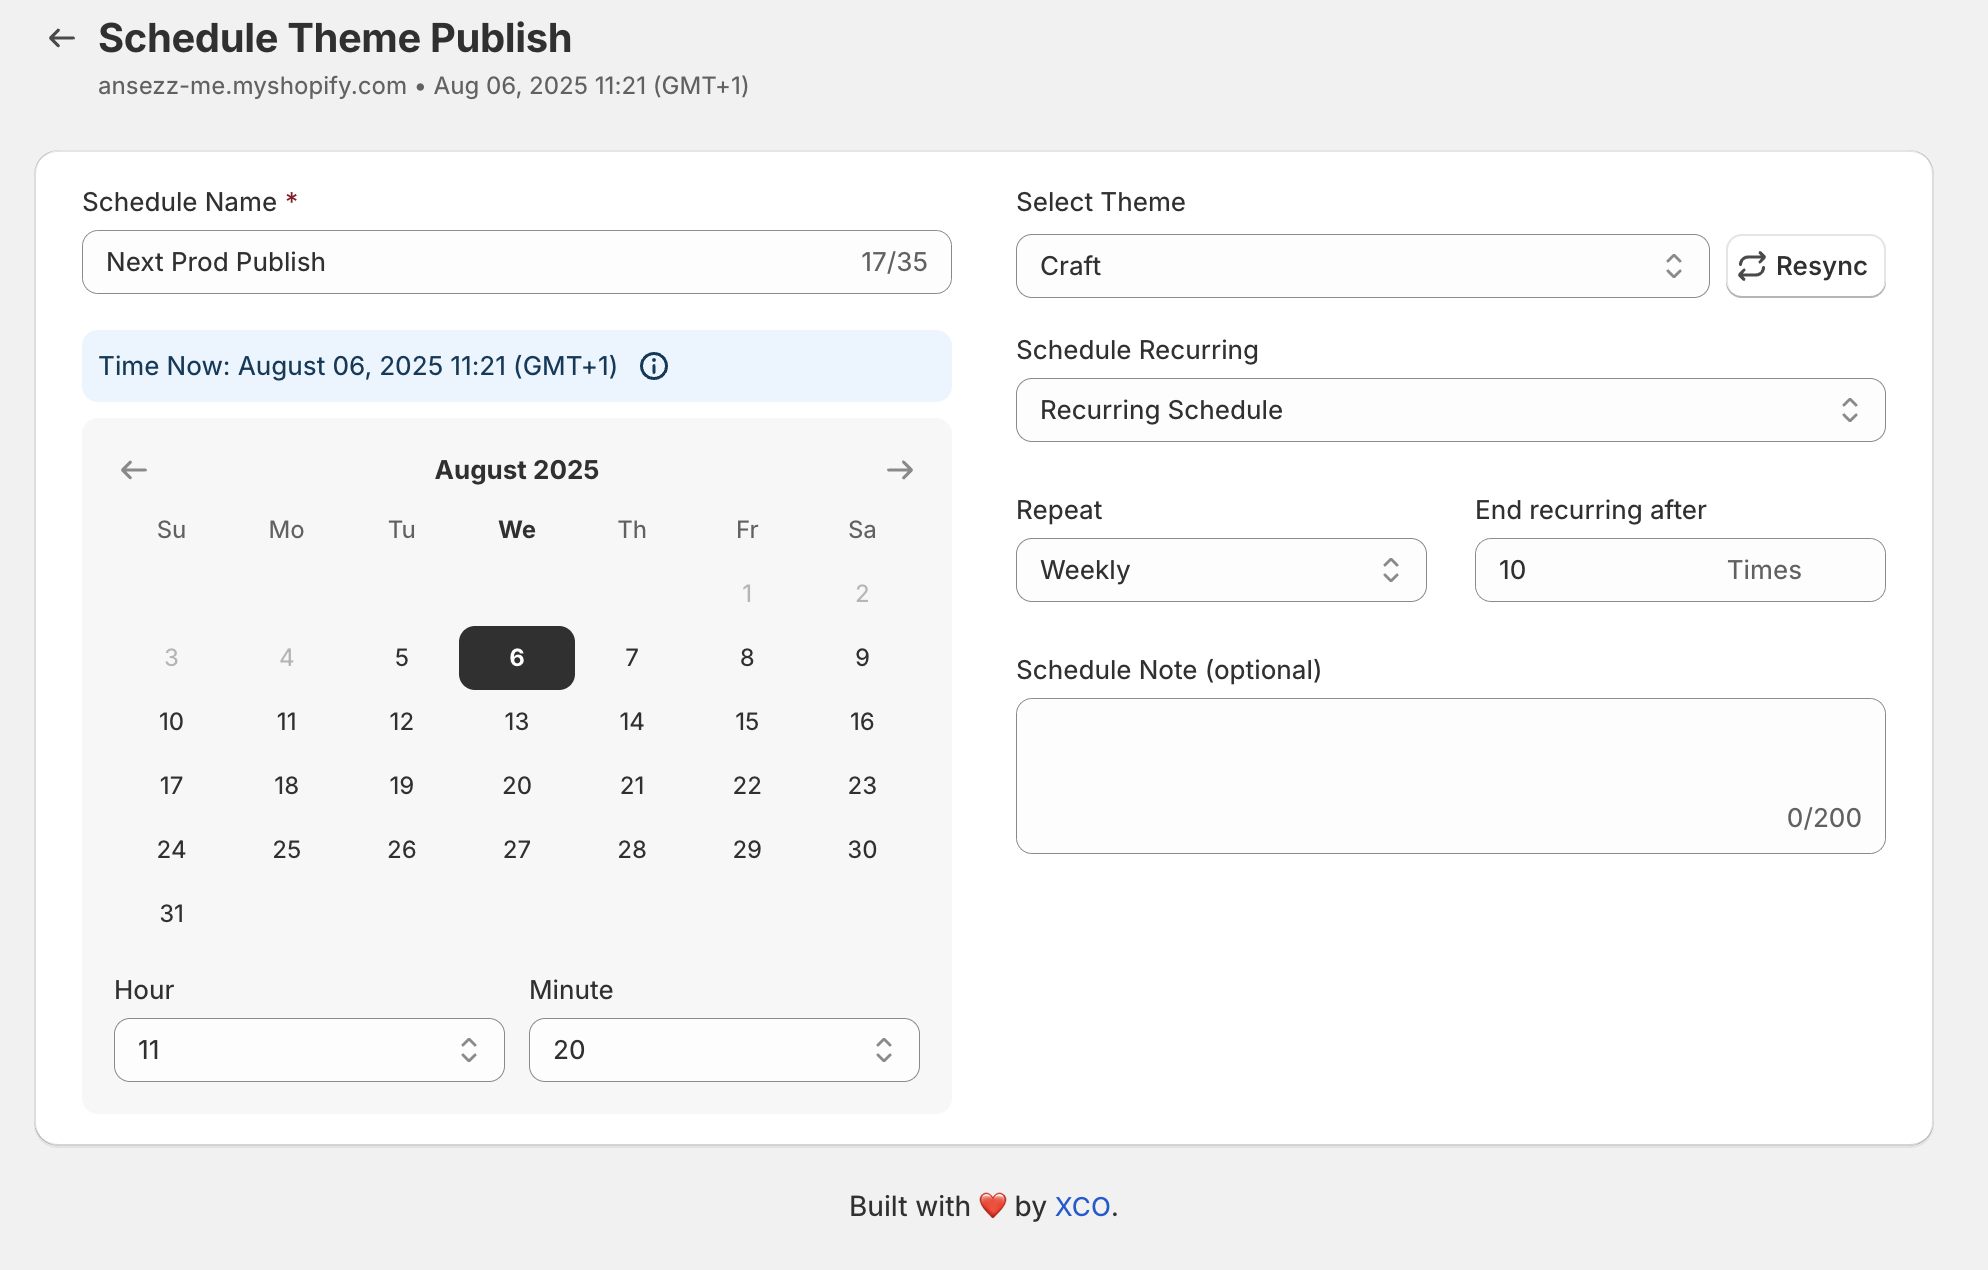
Step 2: Create a New Schedule
Open the Maestro app and click on the "Create New Schedule" button. You will be prompted to give your schedule a name. Use something descriptive, such as "Spring Collection Launch" or "24-Hour Flash Sale," so you can easily identify it in your dashboard later.
Step 3: Select Your Action
Decide what you want to automate. You have several powerful options:
- Theme Publishing: Schedule a completely different theme to become live.
- Section Visibility: Keep your current theme but schedule specific sections (like a hero banner or a countdown timer) to appear or disappear.
- Recurring Changes: Set up tasks that happen every week or month, which is ideal for "Deal of the Week" promotions.
Step 4: Set the Timing
Choose the exact date and time you want the change to occur. Maestro uses your store’s timezone by default, ensuring perfect alignment with your local marketing efforts. If you are planning a temporary change, you can also set an "End Time" to automatically revert the changes.
Step 5: Review and Activate
Double check your settings and click "Save." Your task is now active. You can view all your upcoming changes in a clear, chronological timeline, giving you full visibility into your store’s future state.

Advanced Use Cases for Shopify Plus Merchants
For those involved in shopify plus development, the requirements for automation are often more complex. You might be managing multiple expansion stores or coordinating massive global launches that involve thousands of products and specific theme configurations.
Maestro is built to handle these enterprise level demands. One of the standout features for larger merchants is the ability to manage bulk scheduling. Instead of setting up individual tasks for every minor change, you can coordinate entire campaigns across multiple templates and pages from a single streamlined panel.

Managing Seasonal Promotions
During peak seasons like Black Friday or Cyber Monday, your storefront needs to change rapidly. You might want to show a "Sneak Peek" banner on Monday, a "Early Access" section for VIPs on Wednesday, and the full "Sale Live" theme on Friday. By using automated visibility triggers, you can build all these states into your theme once and then schedule them to toggle automatically. This reduces the risk of site crashes or layout breaks that can happen when themes are manually edited during high traffic periods.
Streamlining Ecommerce Maintenance Services
If you provide ecommerce maintenance services for other brands, Maestro acts as a force multiplier. You can schedule all your clients' updates for the month in one sitting. This not only improves your service reliability but also allows you to provide a more proactive level of support. Instead of waiting for a client to ask for a change, you can pre schedule their holiday updates, ensuring they never miss a promotional window.
Automating Product and Collection Data
Storefront changes are not limited to just the visual theme. Often, a theme change needs to coincide with changes in product availability, pricing, or collection sorting. Maestro’s bulk scheduling capabilities extend into these areas as well, allowing you to align your theme updates with your inventory and catalog management.
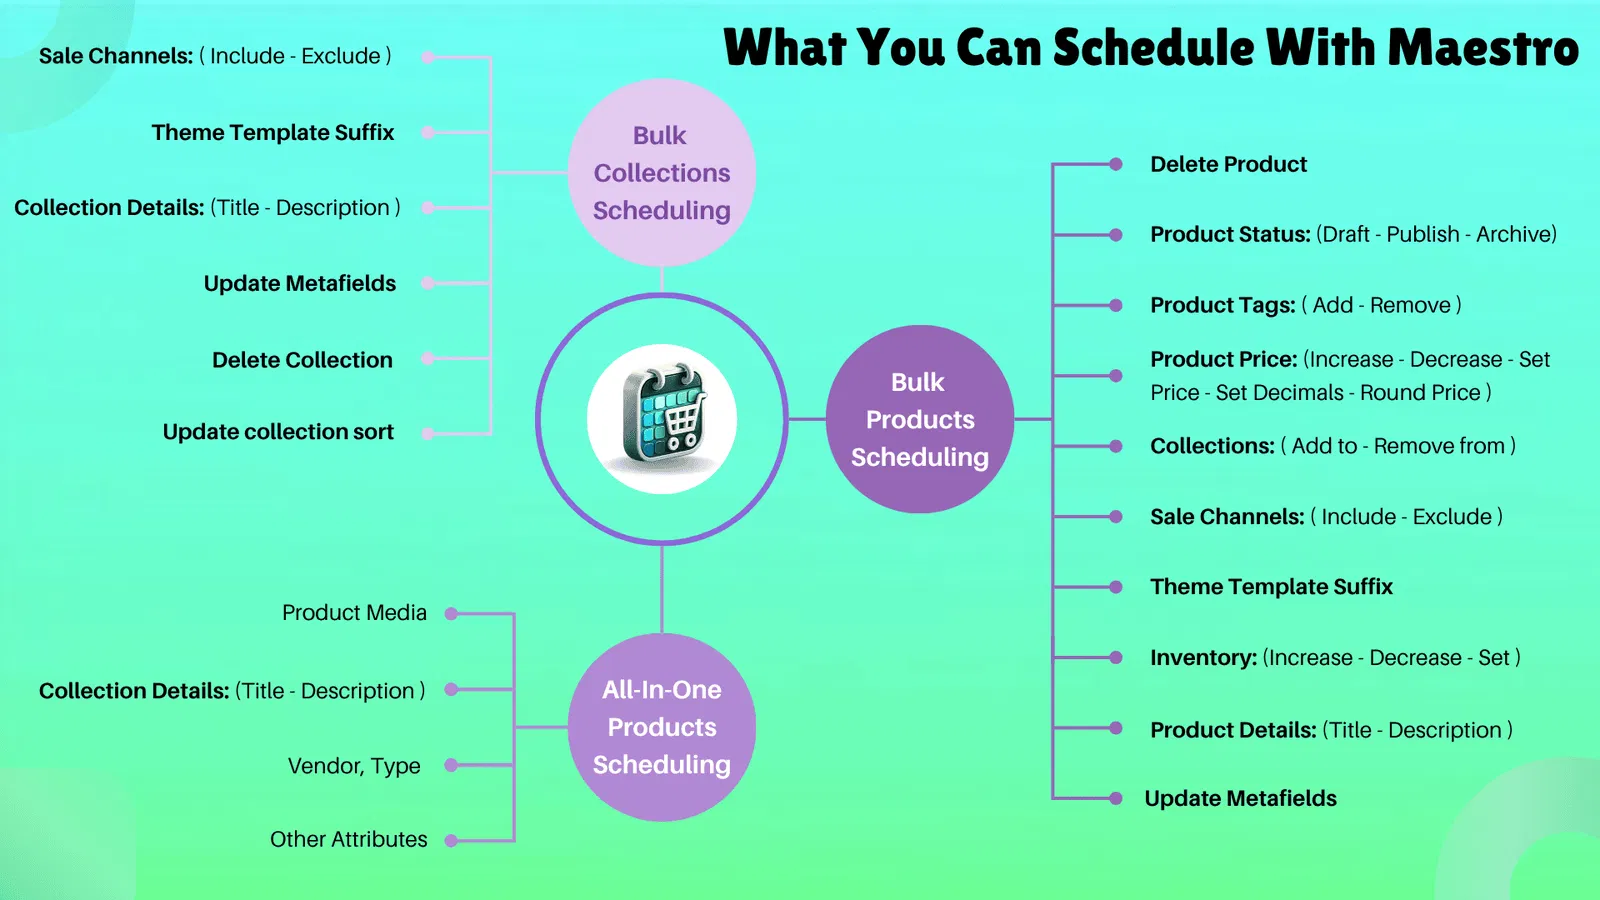
By coordinating theme publishing with product status updates, you ensure a seamless customer journey. There is nothing more frustrating for a customer than clicking a promotional banner for a new collection only to find the products are still "Hidden" or "Out of Stock" because the catalog team hasn't updated the status yet. Automation solves this "sync" problem entirely.
Best Practices for Successful Storefront Automation
To get the most out of your automation strategy, consider these professional tips from our development team:
- Test Your Themes Thoroughly: Always preview your scheduled theme in "Preview Mode" before the launch date. Automation will publish the theme exactly as it exists in your library, so ensure all links and images are working correctly.
- Use Descriptive Notes: Within Maestro, you can add notes to your schedules. Use this to document why a change was made or who authorized it. This is vital for teams with multiple collaborators.
- Monitor Your Timeline: Regularly check your Theme Publishing Timeline to ensure there are no overlapping schedules that might conflict with each other.
- Leverage Shopify Flow: For even more advanced workflows, integrate your theme scheduling with Shopify Flow. This allows you to trigger theme changes based on external events, such as inventory levels hitting a certain threshold.
Conclusion: A Proactive Step Toward Growth
Automating your Shopify storefront changes is a vital step for any merchant looking to move beyond the "hustle" phase and into a more mature, operationally sound business model. It removes the stress of manual launches, eliminates the risk of human error, and provides your team with the freedom to focus on what actually moves the needle: strategy and customer experience.
By spending just five minutes today setting up the Maestro Theme Scheduler, you are reclaiming hours of your future time. Whether you are managing a boutique store or a global Shopify Plus empire, the ability to "set it and forget it" is the ultimate luxury in e-commerce management.
If you are looking to further optimize your store’s performance or need assistance with custom shopify themes, our team at XCO Agency is here to help. From shopify speed optimization to full migration to shopify, we provide the expertise needed to keep your business ahead of the curve. Don't let manual tasks hold you back any longer: start automating today and see the difference it makes in your daily operations and your bottom line.