
As a Shopify expert, I often work with merchants who are seeking a faster way to roll out design updates without late-night launches, rushed QA, or that sinking feeling of “Did we publish the right theme?”
If you’re running custom Shopify themes, you already know the real challenge is not building the theme. It’s maintaining it. Promotions change, banners rotate, seasonal landing pages come and go, and every update creates risk.
Here’s the good news: you can automate theme changes in about five minutes by pairing two approaches:
- Shopify’s built-in tools for creating or iterating on a theme quickly
- Maestro Theme Scheduler for “set it and forget it” publishing and visibility control across sections and blocks
This is especially valuable for teams doing Shopify Plus development and anyone offering or relying on ecommerce maintenance services where consistency and timing are everything.
Why merchants struggle with theme automation (and what “automation” really means)
When store owners tell me they want to “automate the theme,” they usually mean one or more of the following:
-
Publish the right theme at the right time
- Launch a Black Friday version at 12:01 AM
- Revert to the regular theme when the sale ends
-
Show and hide content without manual edits
- Schedule a hero banner, countdown timer, or announcement bar
- Remove promo blocks automatically after a campaign ends
-
Reduce risk during high-revenue moments
- Avoid human error and last-minute publishing mistakes
- Keep a rollback plan ready at all times
-
Stop wasting time on repetitive tasks
- Free your team to focus on conversion optimization instead of admin work
Theme automation is not about being “hands-off forever.” It’s about being hands-off when timing matters, and fully in control when you need to be.
The 5-minute method: automate publishing for custom Shopify themes with Maestro
If you already have a custom theme (or a campaign variant theme) ready in your theme library, Maestro lets you schedule publishing in a way that’s built for real ecommerce operations.
Step 1: Duplicate your theme (create a campaign-ready version)
Start by making a clean copy of your current live theme.
- Navigate to Shopify Admin → Online Store → Themes
- Find your live theme and select Actions → Duplicate
- Rename it clearly:
- Examples: BF 2026 Theme, Flash Sale Theme, Spring Launch Theme
Why this matters
- You isolate campaign changes from your live experience
- You can QA and iterate safely without affecting shoppers
- You can maintain multiple promotional versions for reuse year over year
If you’re moving fast and need a starting point, Shopify’s native AI theme generator can help you spin up a base theme quickly, then your team can adapt it into your brand system. It’s a helpful accelerator, but the real operational win is scheduling and governance.
Step 2: Make your edits (and keep changes scoped)
Open your duplicated theme in the theme editor and add campaign elements.
Focus on changes that drive revenue without creating chaos:
-
Hero and announcement updates
- Promo headline, shipping thresholds, urgency messaging
-
Homepage sections
- Featured collections, seasonal bundles, gift guides
-
Product page blocks
- Limited-time badges, financing messages, trust blocks
-
Navigation
- Temporary menu items for sale collections or landing pages
Tip for Shopify Plus teams: keep campaign components modular (sections and blocks) so you can schedule visibility later without needing a full theme swap for every micro-change.
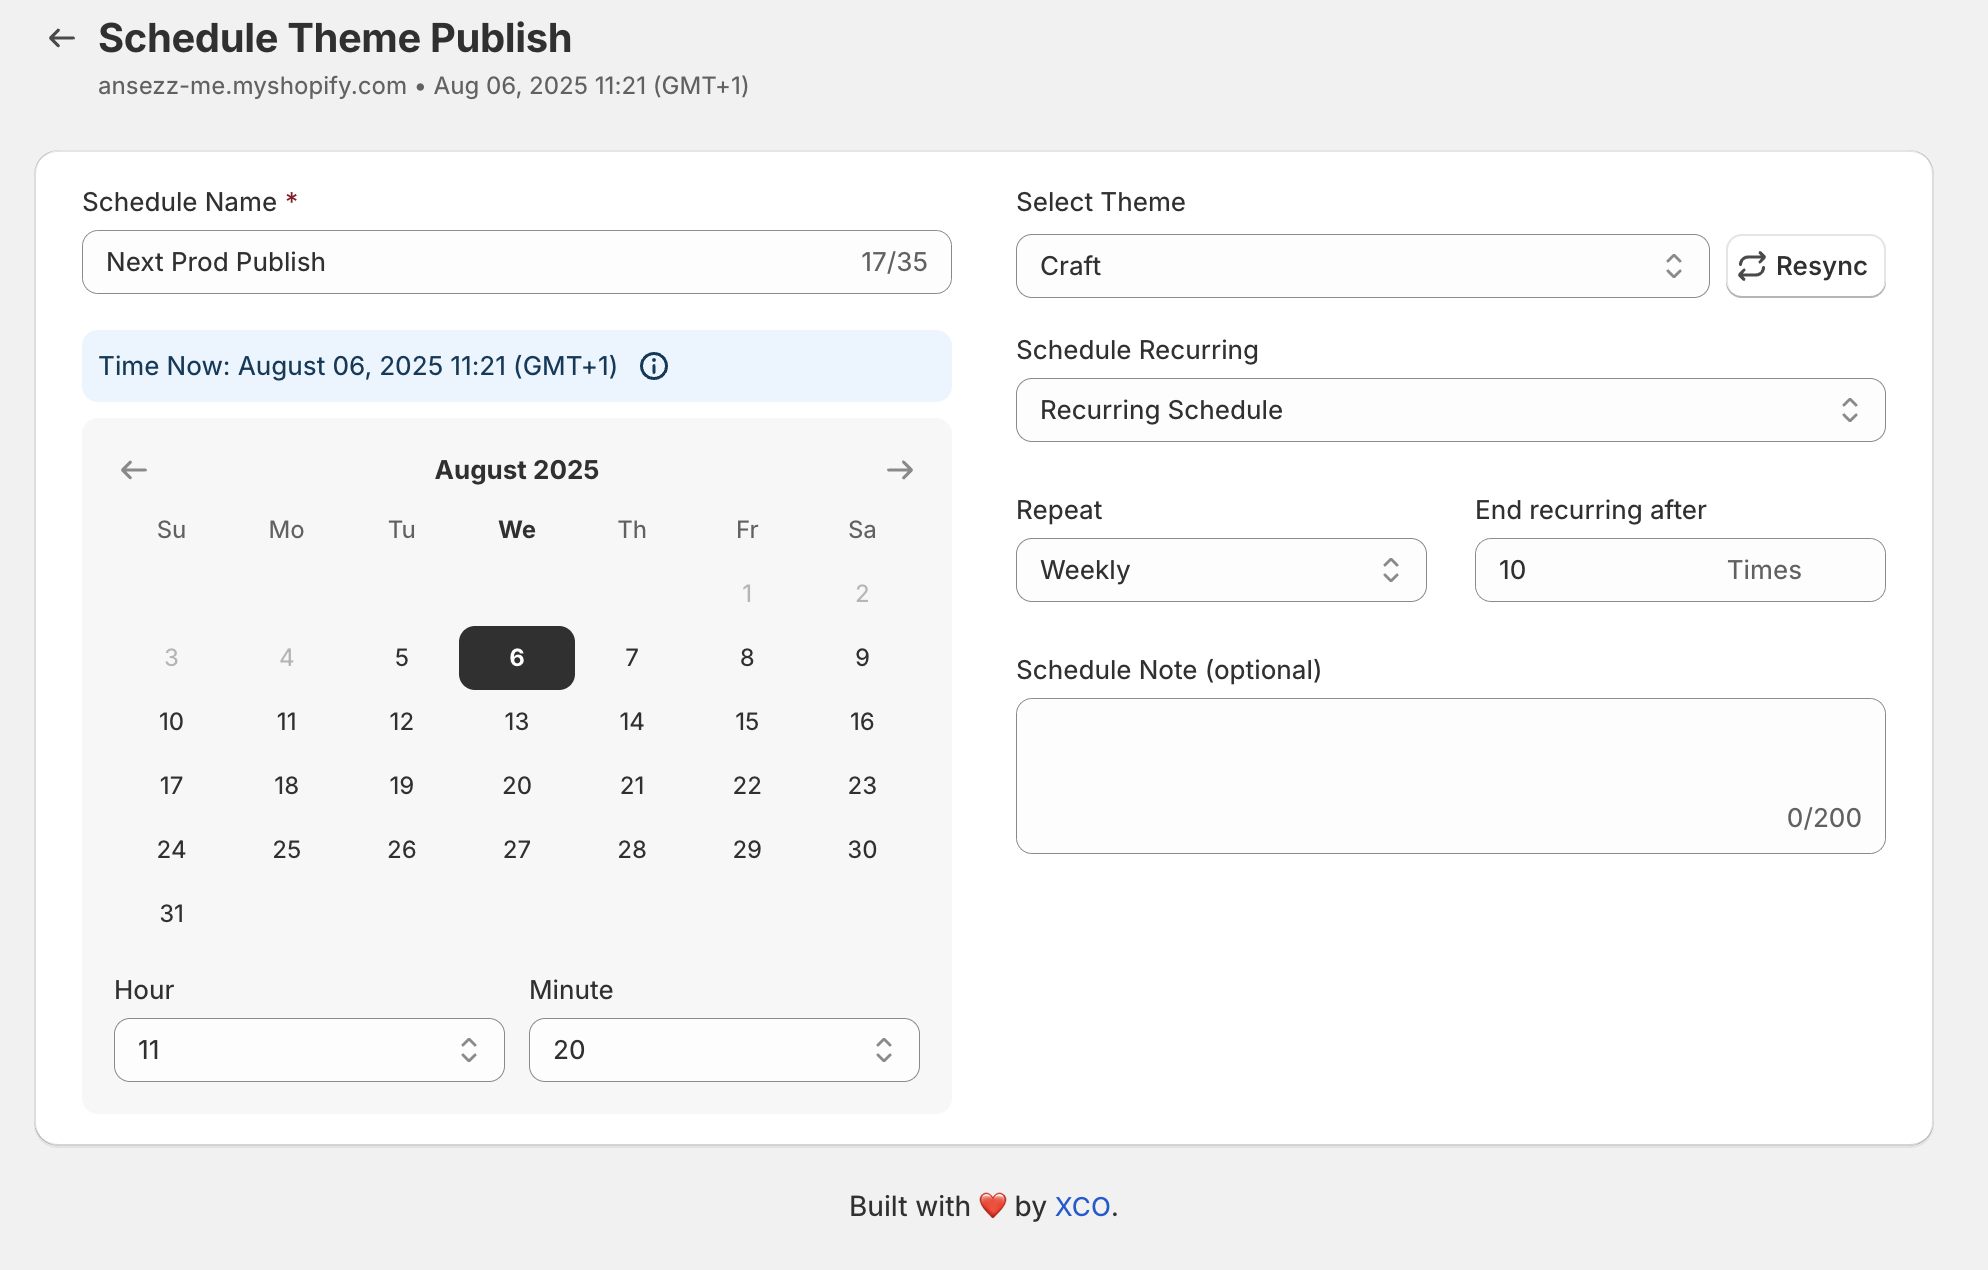
Step 3: Create a publish schedule in Maestro (this is the “5 minutes” part)
Now the automation piece.
- Install and open Maestro Theme Scheduler
- Select Schedule Theme Publishing
- Choose:
- Theme to publish (your campaign theme)
- Date and time
- Optional: Recurring schedule if this repeats weekly or monthly
- Add an internal note like “BF Launch v2, approved by marketing”
Once saved, your store is effectively on autopilot for launch timing.
![Maestro scheduling interface for theme publishing]
What this boosts immediately
- Launch accuracy (no missed minute, no wrong theme)
- Team confidence (clear schedule, fewer Slack fire drills)
- Operational maturity (repeatable release process)
If you want to see how Maestro is positioned and what it covers, visit the app page here: https://xco.agency/pages/maestro-theme-scheduler
Step 4: Schedule the “revert” publish too (your rollback plan, automated)
The most overlooked part of promotions is what happens after they end.
In Maestro, create a second schedule:
- Select your original theme
- Set the publish time for when the promotion ends
- Confirm timezone and timing with your marketing calendar
This is the “set it and forget it” move that prevents:
- expired discount banners lingering for days
- customers emailing support about mismatched messaging
- conversion drops from stale landing experiences
Step 5: Validate with a simple QA checklist (quick, but non-negotiable)
Automation works best with lightweight QA. Before the schedule triggers:
-
Preview the campaign theme
- Check homepage, collection pages, PDP, cart, and checkout styling
-
Confirm tracking and scripts
- Ensure pixels, analytics, and app embeds are present on the duplicated theme
-
Check mobile performance
- Verify key sections do not shift layout on smaller screens
-
Confirm the schedule timezone
- Especially important for global brands and Shopify Markets
This is a vital step for brands doing Shopify Plus development, where multiple stakeholders and regional timelines are common.
Beyond publishing: automate section and block visibility (the real power-up)
Theme swaps are great for major campaigns. But daily operations often require smaller content changes like:
- showing a banner for 48 hours
- hiding a countdown timer when inventory sells out
- running an announcement bar on weekdays only
Maestro is built for this layer too: automating section and block visibility.
![Maestro visual overview of scheduling and section visibility]
How visibility scheduling helps in real stores
-
Seasonal messaging without manual toggles
- Show “Holiday Shipping Cutoff” block only for a defined window
-
Flash sales that end cleanly
- Hide the sale block automatically even if your team is offline
-
A/B-style merchandising
- Rotate sections weekly to keep the storefront fresh
Where this fits for custom Shopify themes
Most custom themes are built with reusable sections and configurable blocks. Visibility scheduling lets you use that flexibility operationally.
- You keep your custom code and design system
- You reduce the need for developer tickets
- You prevent accidental edits to theme settings during busy periods
Seasonal promotions made simple: Black Friday, product drops, and flash sales
Merchants usually plan campaigns in a spreadsheet. The problem is the storefront still relies on humans clicking “Publish” at the right time.
Maestro brings campaign execution closer to how ecommerce teams actually work.
Black Friday and Cyber Monday
Use a two-theme approach:
-
Pre-BFCM theme
- Warm-up messaging, email capture, teaser banners
-
BFCM live theme
- Full discount messaging, gift guides, urgency blocks
-
Post-sale revert
- Return to evergreen theme, swap hero to “New arrivals”
Scheduling advantage
- You can line up all three publishes ahead of time
- You remove the stress of midnight launches
- You reduce mistakes during peak revenue days
Flash sales (48-hour promos)
Use section and block scheduling when you do not need a full theme swap.
- Schedule a flash sale banner to show Friday 9 AM
- Hide it Sunday 11:59 PM
- Optionally, schedule a “Last chance” variant for the final hours
Product drops and limited releases
For drops, timing and coordination are everything.
- Schedule the theme or key sections for the exact launch minute
- Keep pages ready but not visible until go-live
- Coordinate with email and SMS sends without racing the clock
Why Shopify Plus teams and agencies love this for ecommerce maintenance services
If you manage stores for clients, you know the real cost is not building. It’s maintaining.
Maestro supports a better maintenance model:
-
Fewer urgent requests
- Clients stop asking for “Can you publish this at midnight?”
-
More predictable operations
- Schedules serve as a single source of truth
-
Safer change management
- Planned publishes reduce the risk of pushing edits live accidentally
-
Better client experience
- You can offer automation as part of your ecommerce maintenance services package
For Shopify Plus brands with larger catalogs and multiple campaigns, this is a proactive step toward scalable storefront operations.
A simple framework: when to swap themes vs schedule sections
Use this quick decision guide:
Choose a theme swap when:
- You’re changing the overall layout or navigation
- You’re using campaign-specific templates
- Multiple pages require coordinated visual changes
Choose section and block scheduling when:
- You’re changing messaging, banners, and promos
- The campaign touches a small set of content modules
- You want lightweight updates without a full theme publish
This approach keeps your custom Shopify themes stable while still letting marketing move fast.
Common pitfalls (and how to avoid them)
Pitfall 1: Scheduling without a revert
Avoid it by always creating two schedules:
- one to publish the campaign theme
- one to revert
Pitfall 2: Duplicated theme missing app embeds or tracking
Avoid it by checking:
- theme app embeds
- custom scripts
- consent and analytics settings
Pitfall 3: Overusing theme swaps for small changes
Avoid it by using Maestro’s visibility scheduling for:
- promotional blocks
- announcement bars
- timed homepage sections
The bottom line: automation is the fastest way to de-risk revenue moments
The goal is not automation for its own sake. The goal is to optimize execution:
- Launch campaigns on time
- Reduce human error
- Enhance store consistency
- Significantly cut maintenance effort
If you want help setting this up for your store or clients, book a quick call with our team: https://xco.agency/pages/book-a-meeting
Or, if you’re ready to explore the “set it and forget it” workflow, start with Maestro Theme Scheduler here: https://xco.agency/pages/maestro-theme-scheduler