
Meta title: Maestro Theme Scheduler Analytics Integration Guide
Meta description: Learn how to connect Maestro Theme Scheduler with Shopify Flow, GA4, Klaviyo, pixels, and marketing apps for accurate campaign measurement.
As a Shopify expert, I often work with merchants who are seeking a better way to measure the campaigns they schedule across their storefront. They can launch a seasonal theme, publish a flash-sale banner, and send a perfectly timed email, yet still end up asking the same question: Which campaign actually drove the sale?
That is where advanced integration becomes valuable.
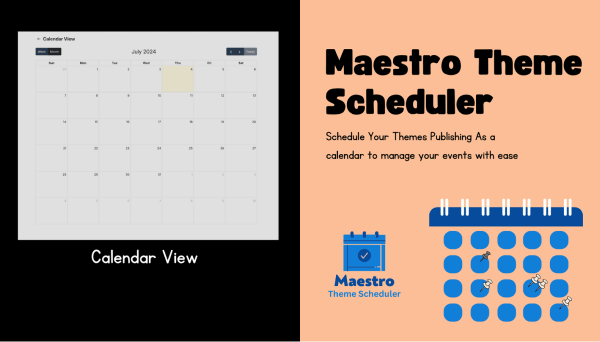
Maestro Theme Scheduler controls what shoppers see and when they see it. Third-party analytics and marketing apps explain what shoppers do next. Connect the two, and your scheduled storefront changes become measurable campaign events rather than isolated design updates.
A connected setup can help you:
- Boost campaign visibility by using one consistent campaign ID across your tools.
- Enhance attribution by aligning Maestro schedules with UTMs, GA4 events, and marketing segments.
- Optimize reporting around precise campaign start and end times.
- Reduce manual work with Shopify Flow, webhooks, and automated metadata updates.
- Significantly improve decision-making by comparing campaign periods with reliable baseline data.
In short, Maestro handles the storefront switch. Your analytics stack tells you whether the switch was worth flipping.
Why scheduling alone is not enough
Scheduling a theme change is already a major operational improvement. You can automate theme publishing, control sections and blocks, rotate banners, and coordinate seasonal content without asking someone to stay awake until midnight with a laptop and an increasingly nervous cup of coffee.
However, scheduling only solves the execution problem.
To measure performance properly, you also need to know:
- Which campaign was active when a visitor arrived.
- Which theme version or promotional section they saw.
- Which email, paid ad, or social post brought them to the store.
- Whether the campaign influenced product views, add-to-cart events, and purchases.
- How performance compared with the pre-campaign and post-campaign periods.
Without this context, your reports may show that revenue increased during a busy weekend. They may not explain whether the new theme, the offer, the email campaign, or an unrelated traffic source deserves the credit.
The solution is to create a shared campaign language across Maestro Theme Scheduler, Shopify, analytics platforms, and marketing apps.
The integration model: Maestro as the campaign switch
A practical architecture has four layers:
- Maestro Theme Scheduler controls scheduled theme publishing and content visibility.
- Shopify Flow coordinates internal actions and sends HTTP requests to external systems.
- Shopify metafields or metaobjects store the active campaign information.
- Analytics and marketing apps record events, segment customers, and report results.
For example, when a scheduled Black Friday theme goes live, the workflow can update a shop metafield such as:
marketing.active_campaign_id = bf_2026_main
marketing.active_campaign_name = Black Friday 2026
marketing.campaign_status = active
Your theme, pixels, analytics tools, and marketing apps can then use that information to understand which campaign is currently active.
When the schedule ends, a second workflow can clear the values or update the status to ended.
This creates a simple chain:
Maestro schedule starts → Shopify Flow updates campaign data → analytics and marketing apps receive the event → reporting connects activity to the campaign.
Step-by-step: Build a campaign measurement workflow
Step 1: Create a consistent campaign ID
Start by defining a campaign naming convention before creating your Maestro schedule.
Use short, readable IDs that can work across Shopify, GA4, Klaviyo, advertising platforms, and internal reports.
For example:
bf_2026_mainsummer_sale_2026free_shipping_week_2026new_collection_aw26
Keep the same ID everywhere.
Under the same campaign record, document:
- Campaign name.
- Start and end date.
- Storefront changes.
- Landing pages.
- Offer or discount code.
- Email and advertising campaigns.
- Primary success metrics.
- Associated GA4 reports and Klaviyo flows.
For more complex stores, consider using a Shopify metaobject to store campaign details. A metaobject can hold structured information rather than placing every value in a separate metafield.
Step 2: Schedule the storefront change in Maestro
Navigate to Maestro Theme Scheduler and create the relevant schedule.
Depending on your campaign, you might schedule:
- A complete theme publish for a major seasonal event.
- A homepage banner for a short promotion.
- A section or block visibility change.
- A recurring promotional layout.
- A market-specific content update.
Add the campaign ID to the schedule name or notes. For example:
BF_2026_MAIN | Black Friday homepage theme
This small step makes the schedule easier to identify later, especially when a store has dozens of recurring updates.
Set the correct timezone and verify the start and end times. A campaign that starts at midnight in New York but at 5 a.m. in London needs more than a quick glance at the calendar.
Step 3: Connect the schedule to Shopify Flow
Use Shopify Flow as the orchestration layer when your Maestro setup exposes relevant events or triggers.
The exact trigger names can vary by app version and configuration, but the workflow pattern typically looks like this:
- Select the Maestro schedule event, such as a schedule starting or ending.
- Update the active campaign metafields in Shopify.
- Send an HTTP request to your analytics middleware, customer data platform, or server-side tracking endpoint.
- Send a campaign event to your marketing platform.
- Log the workflow result for troubleshooting.
Shopify Flow’s Send HTTP request action supports external endpoints and allows you to include dynamic values in the request body.
A conceptual payload might look like this:
{
  "event": "campaign_started",
  "campaign_id": "bf_2026_main",
  "campaign_name": "Black Friday 2026",
  "status": "active",
  "started_at": "2026-11-27T00:01:00Z",
  "source": "maestro_theme_scheduler"
}
Treat this as a campaign notification rather than a purchase event. It tells your tools that the storefront experience has changed.
Step 4: Expose campaign context to the storefront
Your custom Shopify theme needs a way to make the active campaign available to analytics scripts and pixels.
One common approach is to expose the campaign data through Liquid:
<script type="application/json" id="shop-campaign-context">
  {
    "id": {{ shop.metafields.marketing.active_campaign_id.value | json }},
    "name": {{ shop.metafields.marketing.active_campaign_name.value | json }},
    "status": {{ shop.metafields.marketing.campaign_status.value | json }}
  }
</script>
Your analytics implementation can read this JSON and attach the campaign ID to relevant events.
For example, you may include campaign_id on:
page_viewview_itemadd_to_cartbegin_checkoutpurchase
Use Shopify’s pixels and customer events framework where possible. It provides a more structured approach than adding multiple third-party scripts directly to theme files.
This is especially important for Shopify Plus development, where performance, consent, maintainability, and multi-market complexity all need to be considered together.
Step 5: Align UTMs with the Maestro schedule
UTMs remain one of the simplest ways to connect marketing traffic with campaign performance.
For every campaign, define a canonical utm_campaign value that matches the Maestro campaign ID:
utm_campaign=bf_2026_main
Then use the usual supporting parameters:
utm_source=klaviyo
utm_medium=email
utm_content=vip_early_access
Apply the same campaign ID to:
- Email links.
- Paid social ads.
- Search ads.
- Influencer links.
- Affiliate URLs.
- SMS campaigns.
- Partner promotions.
In GA4, use utm_campaign alongside the campaign context passed from the storefront. This helps separate traffic attribution from onsite experience attribution.
A visitor may arrive through a paid ad but convert after seeing a scheduled promotional theme. Both details matter.
Connecting Maestro with common analytics and marketing apps
GA4 and server-side measurement
For GA4, you have two practical options.
Client-side measurement
Your custom pixel or analytics layer reads the active campaign ID and adds it as an event parameter.
Register parameters such as these as custom dimensions in GA4:
campaign_idcampaign_nametheme_versioncampaign_status
Google’s GA4 event parameters documentation explains that custom parameters must be registered before they become available for reporting.
Server-side measurement
For a more advanced setup, send campaign start and end events to your server or server-side tag manager. The endpoint can then forward them to GA4 using the Measurement Protocol.
Useful events include:
campaign_started
campaign_ended
Include parameters such as:
- Campaign ID.
- Campaign name.
- Theme version.
- Start or end timestamp.
- Market or region.
- Offer type.
This gives your reports clear campaign milestones. It also provides a useful reference point when comparing conversion rate, revenue per session, and average order value before, during, and after a scheduled campaign.
Klaviyo and lifecycle marketing
Klaviyo can use custom events to trigger flows and create segments. Shopify Flow can send campaign notifications to a secure middleware endpoint, which then calls Klaviyo’s Create Event API.
For a campaign start event, include:
campaign_idcampaign_namecampaign_typetheme_versionstarted_at
You can then use the event to support campaigns such as:
- Reminder messages during an active sale.
- Browse-abandonment follow-ups tied to a promotion.
- VIP early-access messaging.
- Post-campaign follow-ups for visitors who did not purchase.
- Regional messaging for market-specific storefront updates.
Use Klaviyo’s server-side event endpoint for backend workflows. Do not expose a private API key in theme code or browser-side scripts.

Advertising pixels and customer data platforms
Meta, TikTok, Pinterest, and other advertising platforms can also benefit from campaign context.
Depending on your consent setup and platform requirements, pass the campaign ID as a custom event parameter or use it in your server-side event pipeline.
For a larger Shopify Plus store, consider sending the same campaign event to a CDP or data warehouse. This can help unify:
- Storefront experience data.
- Customer profile data.
- Email engagement.
- Paid media performance.
- Order and product data.
The goal is not to send every possible field to every tool. That is how dashboards become digital junk drawers. Send the fields your team will actually use.
Example: Measuring a Black Friday theme launch
Imagine a merchant schedules a Black Friday theme to publish at 12:01 a.m. on November 27.
Here is the workflow:
- Maestro publishes the scheduled theme.
- Shopify Flow receives the schedule-start event.
- Flow updates
marketing.active_campaign_idtobf_2026_main. - Flow sends a
campaign_startedevent to the analytics endpoint. - The storefront exposes the campaign ID through the theme data layer.
- GA4 records campaign context on shopper events.
- Klaviyo receives the event and activates a campaign-specific flow.
- All email and paid media links use
utm_campaign=bf_2026_main. - At the scheduled end time, Flow sends
campaign_ended. - The merchant compares campaign performance against the previous seven-day baseline.
The final report can answer more useful questions than “Did sales go up?”
It can show:
- Conversion rate while the theme was active.
- Revenue from campaign-tagged traffic.
- Conversion differences by device and market.
- Performance of the scheduled banner or landing page.
- Email-assisted revenue during the active window.
- Post-campaign conversion behavior.
That is the difference between running a promotion and learning from one.
Guardrails for a reliable integration
Before launching, complete these checks:
- Test start and end events in a development or duplicate theme environment.
- Confirm timezone settings in Maestro, Shopify, Flow, GA4, and marketing tools.
- Use one campaign ID everywhere to avoid mismatched reports.
- Protect API credentials with secure middleware or approved app connections.
- Respect customer consent before sending analytics and advertising events.
- Avoid duplicate tracking across pixels, theme scripts, and app embeds.
- Record failed requests and create alerts for important campaign workflows.
- Compare against a baseline, not just the previous day.
- Document recurring schedules so future campaigns remain easy to audit.
For merchants managing custom Shopify themes, this testing phase is particularly important. A small change to a section schema, metafield reference, or app embed can affect both the storefront and the measurement layer.
Turn scheduled storefront changes into measurable growth
Maestro Theme Scheduler is most powerful when it works as part of a broader commerce system. It can automate the storefront experience, while Shopify Flow, GA4, Klaviyo, pixels, and custom integrations provide the measurement and marketing intelligence around it.
The vital step is to give every schedule a shared campaign identity. Once your campaign IDs, metafields, UTMs, events, and reports line up, your team can move from guessing to optimizing.
That is a proactive step for any growing Shopify store, and an especially valuable one for brands investing in Shopify Plus development, custom storefront experiences, and multi-channel campaigns.
Install Maestro Theme Scheduler and start connecting scheduled storefront changes to the tools that measure your growth. If your integration needs are more complex, book a consultation with XCO Agency to plan a scalable Shopify architecture.