
As a Shopify expert, I often see store owners struggling with the logistics of timing. Whether it is a midnight product drop, a weekend flash sale, or a seasonal collection refresh, the manual work involved in updating a catalog can be overwhelming. Many merchants find themselves seeking a way to step away from their screens without sacrificing the precision of their marketing campaigns.
The reality of modern e-commerce is that your store never sleeps, but you certainly should. Staying up until 12:00 AM to switch a product status from Draft to Active is not a scalable strategy. It is an invitation for human error, missed deadlines, and operational burnout. By leveraging the right automation tools, you can transform your shopify store setup into a self-sustaining machine that handles these transitions with surgical accuracy.
Why automated scheduling is vital for your growth
Implementing a robust scheduling system like the Maestro Product Scheduler offers immediate advantages for your business operations. Here are the primary benefits you can expect:
- Eliminate manual errors - Automation removes the risk of forgetting to update a price or remove a sale tag after a promotion ends.
- Recover valuable time - You can batch your work during business hours and let the system handle the deployment at any time of day or night.
- Enhance customer trust - Consistent, well-timed updates ensure that your store always looks professional and up-to-date.
- Improve campaign agility - Quickly pivot your strategy by pre-scheduling multiple scenarios for different marketing events.
1. Master the launch with the Draft Helper
One of the most significant pain points for merchants is the "go-live" moment. Traditionally, this required manual intervention to toggle product visibility across various sales channels. With the Draft Helper feature, you can prepare your entire launch days or weeks in advance.
As a consultant, I recommend using this tool to manage high-traffic drops. You can set specific products to transition from a draft state to active at a precise second. This ensures that your social media announcements and email blasts align perfectly with the availability of your inventory. Once you have configured the schedule, the app takes over the heavy lifting, allowing you to focus on managing the influx of traffic rather than clicking buttons in the Shopify admin.

2. Automate your tag management for seasonal sales
Tags are the invisible engine behind many Shopify features, from automated collections to filtering and search. During a seasonal sale, you might need to add a "Summer Sale" tag to hundreds of items and then painstakingly remove them once the event concludes. This is a prime example of where manual updates lead to inconsistencies.
The Product Scheduler allows you to define start and end dates for specific tags. This means you can:
- Select the products involved in the upcoming promotion.
- Set a start date for the "Sale" tag to appear.
- Set an end date for the tag to be automatically stripped away.
This level of precision is essential for conversion rate optimization because it prevents customers from finding outdated "Sale" items that have reverted to full price, which is a major friction point in the user journey.
3. Implement smart price changes and rounding rules
Pricing strategy is a dynamic part of e-commerce, but updating prices across a large catalog is often a bottleneck. Whether you are running a temporary discount or adjusting your margins across a whole category, doing this manually is inefficient.
The Maestro app provides a sophisticated pricing engine that goes beyond simple discounts. You can schedule price increases, decreases, or set fixed values for specific periods. Furthermore, the rounding rules ensure your prices always look clean. Instead of a messy $19.84, you can instruct the system to round every update to the nearest .99 or .00. This maintains your brand's aesthetic standards across the entire catalog without requiring a spreadsheet for every adjustment.
4. Leverage inventory automation for restocks
Restocking a popular item should be a moment of celebration, not a frantic dash to update your website. I frequently advise clients to use inventory automation to manage the visibility of their products based on stock levels.
When a shipment arrives, you can schedule the product to become visible again at a specific time, perhaps coinciding with a "Back in Stock" email notification. By syncing your restock schedule with your marketing efforts, you create a seamless experience for your customers. This proactive step ensures that you never miss a sale because a product was hidden longer than necessary, nor do you frustrate customers by showing products that are not yet ready for fulfillment.

5. Optimize collection visibility and sorting
Your homepage and collection pages are your digital storefront windows. Just as a physical store changes its display for different seasons, your online store should reflect the current priorities of your business. Managing collection visibility is a key component of effective ecommerce maintenance services.
With the Maestro scheduler, you can automate the sorting order of products within a collection. For example, you might want to push your highest-margin items to the top during a holiday weekend. You can also schedule entire collections to appear or disappear. If you have a "Holiday Gift Guide" collection, you can set it to publish on November 1st and archive itself on December 26th automatically. This keeps your site fresh and relevant without any post-holiday manual cleanup.
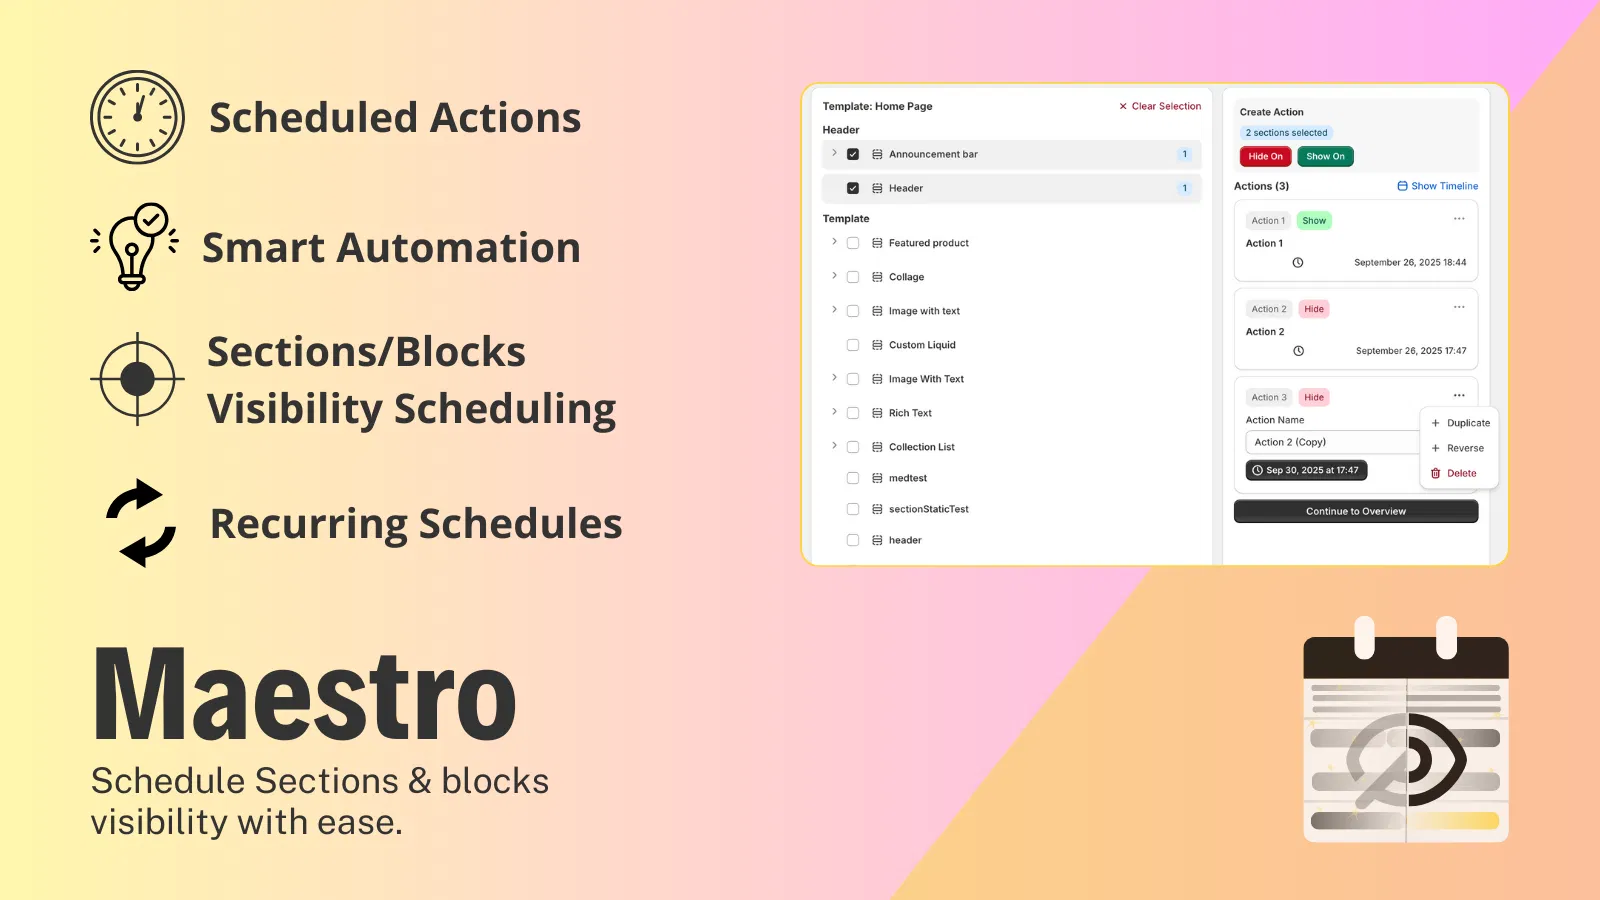
How to set up your first automated schedule
Getting started with automation does not have to be intimidating. The interface is designed to be intuitive and integrates directly with your existing Shopify admin. Here are simple steps to create your first scheduled update:
- Navigate to the Maestro app - Open the app from your Shopify admin dashboard.
- Select your products - Use the search and filter tools to find the specific items you want to update.
- Choose your action - Decide whether you are changing a price, adding a tag, or toggling visibility.
- Set the timeline - Pick the exact date and time for the change to take effect.
- Review and Save - Check the summary of your schedule to ensure all details are correct.
Once your schedule is saved, you can view it on the timeline to see how it interacts with other planned updates. This bird's-eye view is a vital tool for planning your marketing calendar.
Conclusion
The transition from manual catalog management to automated scheduling is a pivotal moment for any growing e-commerce brand. It moves you from a reactive state, where you are constantly putting out fires and chasing deadlines, to a proactive one where your store is working for you.
By utilizing the Draft Helper, automated tags, smart pricing, inventory triggers, and collection sorting, you significantly reduce the operational burden on your team. This allows you to focus on high-level strategy and growth rather than the minutiae of daily maintenance. As we have discussed, these tools are not just about convenience; they are about accuracy, professionalism, and ultimately, your bottom line.
If you are ready to stop wasting time on manual updates and start running a more efficient, hands-off store, I encourage you to explore the Maestro Product Scheduler. Taking this proactive step today will pay dividends in the form of smoother launches and a more consistent customer experience. For those who need more comprehensive assistance with their Shopify presence, our team at XCO Agency is always here to help with everything from initial domain setup to advanced conversion audits.