
As a Shopify expert, I often work with high-growth merchants who find themselves trapped in a cycle of manual updates and late-night spreadsheets. They spend hours manually adjusting product prices for weekend promotions, only to realize on Monday morning that half of their catalog is still showing sale prices. This manual friction does more than just cause stress; it limits the agility of your business and creates unnecessary risks for your profit margins.
The modern e-commerce landscape demands a more sophisticated approach. Whether you are running a lightning-fast flash sale, a week-long seasonal clearance, or a complex dynamic pricing strategy, the ability to automate these shifts is vital. By leveraging the Product Scheduler by Maestro, merchants can transition from reactive price management to a proactive, automated system that runs while they sleep.
In this guide, I will walk you through the strategic importance of scheduled price changes and provide a clear framework for implementing flash sale automation effectively.
The High Stakes of Manual Price Management
Many store owners struggle with the sheer volume of data entry required to run a successful promotion. When you are managing hundreds or thousands of SKUs, the margin for error is significant. A single misplaced decimal point or a forgotten revert can lead to significant financial losses or customer dissatisfaction.
Seeking a way to scale without adding headcount, merchants are increasingly turning to automation to solve these common challenges:
- Human Error and Inconsistency: Manually updating prices across multiple collections often leads to missed products or incorrect values.
- Operational Burnout: Scheduling sales for midnight or holiday weekends forces staff to work during off-hours to ensure the storefront remains accurate.
- Lack of Agility: Without automation, launching a spontaneous flash sale to react to a competitor or a sudden inventory surplus is nearly impossible.
- Delayed Reversion: The longer it takes to revert prices to their original state after a sale, the more revenue is lost to unnecessary discounting.
By automating these processes, you ensure that your store remains professional, your margins are protected, and your team is freed up to focus on growth strategies rather than data entry.

Why Automation is the Secret Weapon for Scaling
Automating your price changes does more than just save time. it allows you to execute more complex marketing strategies that would be too difficult to manage manually. Dynamic pricing on Shopify is no longer a luxury reserved for enterprise-level brands. With the right tools, any merchant can implement sophisticated pricing tiers.
There are several key advantages to using a product scheduler for your pricing automation:
- Precision Timing: Ensure that your sale starts and ends at the exact second your marketing emails hit the inbox.
- Coordinated Campaigns: Sync your price changes with theme updates and collection visibility to create a cohesive shopping experience.
- Enhanced Customer Trust: Avoid the confusion of customers seeing old sale prices in search results or on product pages after a promotion has supposedly ended.
- Operational Security: Use pre-scheduled workflows to double-check pricing logic days before the event actually goes live.
Step-by-Step Guide to Scheduling Price Changes
Setting up automated price changes requires a structured approach to ensure everything functions as intended. Here are the simple steps to take your pricing from manual to autopilot using the Product Scheduler by Maestro.
Step 1: Define Your Promotion Scope
Before navigating to your scheduling tool, you must have a clear understanding of what you are discounting and why. Identify the specific products, variants, or collections that will participate in the event.
- Segment your inventory: Determine if you are running a site-wide sale or targeting specific categories like "Clearance" or "New Arrivals."
- Set your goals: Decide if the goal is to clear out old stock, acquire new customers, or increase the average order value (AOV).
- Calculate margins: Ensure that the discounted price still allows for a healthy profit after shipping and acquisition costs.
Step 2: Configure the Price Changes
Once your scope is defined, you will use the Product Scheduler to input your new pricing data. This is where you set both the promotional price and the instructions for the eventual revert.
- Navigate to the Scheduler: Access the Maestro dashboard within your Shopify admin.
- Select your products: Use the bulk selection tools to identify the items included in the flash sale.
- Input sale values: Enter the new "Sale Price" and ensure the "Compare at Price" is accurately set to highlight the savings to the customer.
- Verify revert logic: Confirm that the tool is set to restore the original prices once the scheduled window closes.

Step 3: Set the Execution Schedule
The schedule is the heart of the automation. You must be precise with your start and end dates to ensure alignment with your other marketing channels.
- Choose start and end times: Select the exact date, hour, and minute for the price shift.
- Coordinate with time zones: If you serve a global audience, ensure the schedule aligns with the time zone where the majority of your traffic originates.
- Enable recurring rules: For ongoing promotions, such as "Weekend Deals," set recurring schedules that activate every Friday evening and revert on Monday morning.
Step 4: Preview and Test
Before the sale goes live, it is vital to review the scheduled actions. Proactive checking prevents embarrassing mistakes on the day of the launch.
- Check the dashboard: Review the list of "Upcoming Actions" in the Maestro interface to verify the product list.
- Sync with theme changes: If you are using Shopify design services to create custom banners, ensure the visual assets and the price changes are scheduled for the same moment.
- Run a small test: Schedule a 5-minute price change on a hidden test product to confirm the automation triggers correctly.

Advanced Dynamic Pricing Strategies
Dynamic pricing involves more than just a simple "20% off" sale. It is about using data to adjust prices in real-time or near-real-time to maximize revenue. As your business grows, you can move toward more advanced automation strategies.
Flash Sale Automation for High-Volume Events
During events like Black Friday or Cyber Monday, the traffic load on a Shopify store can be immense. Using a dedicated scheduler ensures that your server-side updates happen efficiently without slowing down the storefront.
- Timed Product Drops: Schedule new products to become visible and priced correctly at the exact start of a launch event.
- Tiered Discounting: Set prices to drop further every few hours during a "Moving Sale" to increase urgency as stock levels deplete.
- Inventory-Based Triggers: While primarily time-based, some advanced workflows can adjust pricing as stock levels hit certain thresholds.
Seasonal and Periodic Pricing
Many industries, such as fashion or home decor, rely on seasonal shifts. Automating these transitions months in advance allows your team to focus on the next season's creative work.
- End-of-Season Clearouts: Schedule gradual price reductions over a three-week period to move old inventory before the new collection arrives.
- Holiday Specific Pricing: Automatically apply premium pricing during peak demand periods or discounts during traditional retail lulls.
- Recurring Weekly Specials: Establish "Deal of the Week" automations that rotate through different collections without manual intervention.
Best Practices for Flash Sale Success
Scheduling the prices is only one part of a successful sale. To truly optimize your results, you must consider the entire customer journey. After completing your pricing setup, keep these best practices in mind:
- Communicate Scarcity: Use countdown timers on your product pages that sync with the automated end-time of your sale.
- Optimize Performance: Ensure your store is fast. High-traffic sales can be ruined by slow load times. Consider Shopify speed optimization if you expect major spikes.
- Prevent Discount Stacking: Check your Shopify discount settings to ensure that automated price changes do not accidentally combine with existing coupon codes in a way that erodes your profit.
- Monitor in Real-Time: Even with automation, keep an eye on your dashboard during the first ten minutes of a major launch to ensure everything has triggered as expected.
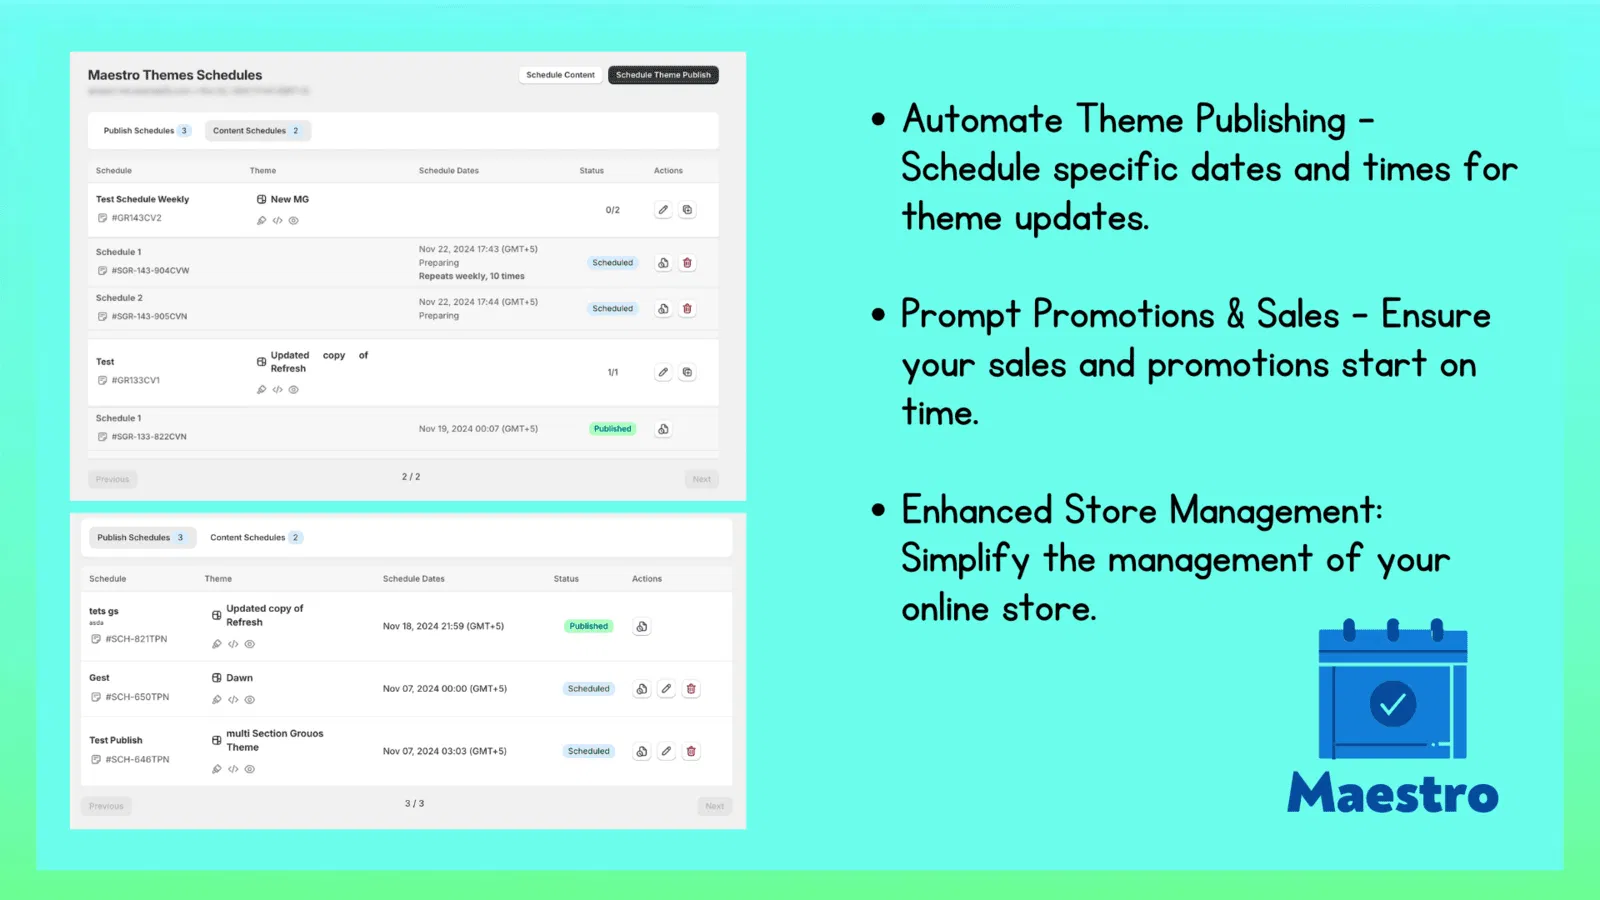
Conclusion: Taking the Stress Out of E-commerce
Mastering dynamic pricing on Shopify is a vital step for any merchant looking to scale their operations without increasing their manual workload. The Product Scheduler by Maestro transforms the way you approach sales, moving you away from frantic manual updates and toward a streamlined, professional automation system.
By following the structured steps outlined in this guide, you can ensure that your flash sales are executed with precision, your margins are protected, and your customer experience remains top-tier. Scheduling price changes is not just a technical convenience; it is a strategic advantage that allows you to be more aggressive and creative with your marketing.
If you are ready to stop managing your store through manual labor and start leveraging the power of automation, exploring a comprehensive Shopify Plus Partner like XCO Agency can help you integrate these advanced tools into your existing workflow.
Ready to put your pricing on autopilot? Explore the full capabilities of the Maestro Theme Scheduler today and start planning your next high-impact flash sale with confidence.