
As a Shopify expert, I often work with merchants who are gearing up for their biggest sales of the year. Black Friday. Summer blowouts. Holiday campaigns. The excitement is real, but so is the stress. One question keeps coming up: how do you update your entire store theme without spending hours clicking through every single page?
If you have ever stayed up until midnight manually pushing theme changes across your Home page, Collection pages, and Product templates just to hit a launch time, you know exactly what I am talking about. The good news is that there is a better way.
The Real Problem With Manual Theme Updates
Running a global sale or a coordinated campaign means every part of your store needs to look the part at the exact same moment. Your homepage banner, collection headers, product badges, and promotional messaging all need to flip on simultaneously.
Here is what usually happens instead:
- You update the Home page first, but forget the Collection page
- Your Product template still shows last week's promo
- Customers see mismatched messaging and get confused
- Your brand experience takes a hit
Manual updates are time consuming, error prone, and honestly, a little chaotic. For merchants running multiple campaigns throughout the year, this quickly becomes unsustainable.
Why Theme Coordination Matters for E-commerce Campaign Management
Your store theme is not just decoration. It is your brand's first impression. When a customer lands on your site during a big sale, every element should reinforce the same message.
A seamless brand experience builds trust. It tells customers you have your act together. Disjointed visuals, on the other hand, can make even legitimate promotions feel sketchy.
Beyond perception, there is also the practical side. Coordinated theme updates help you:
- Launch campaigns with precision timing across all templates
- Maintain consistent messaging from homepage to checkout
- Reduce the risk of embarrassing errors going live
- Free up your team to focus on strategy instead of manual tasks
This is where Shopify theme automation becomes essential.
Enter Maestro Theme Scheduler
Maestro Theme Scheduler is built specifically for merchants who need to coordinate theme changes without the chaos. The standout feature? Multi-schedule support across templates.
Instead of updating pages one by one, you can group schedules together and set synchronized launch times. Your Home page, Collection pages, and Product templates all update at once. No more midnight scrambles.
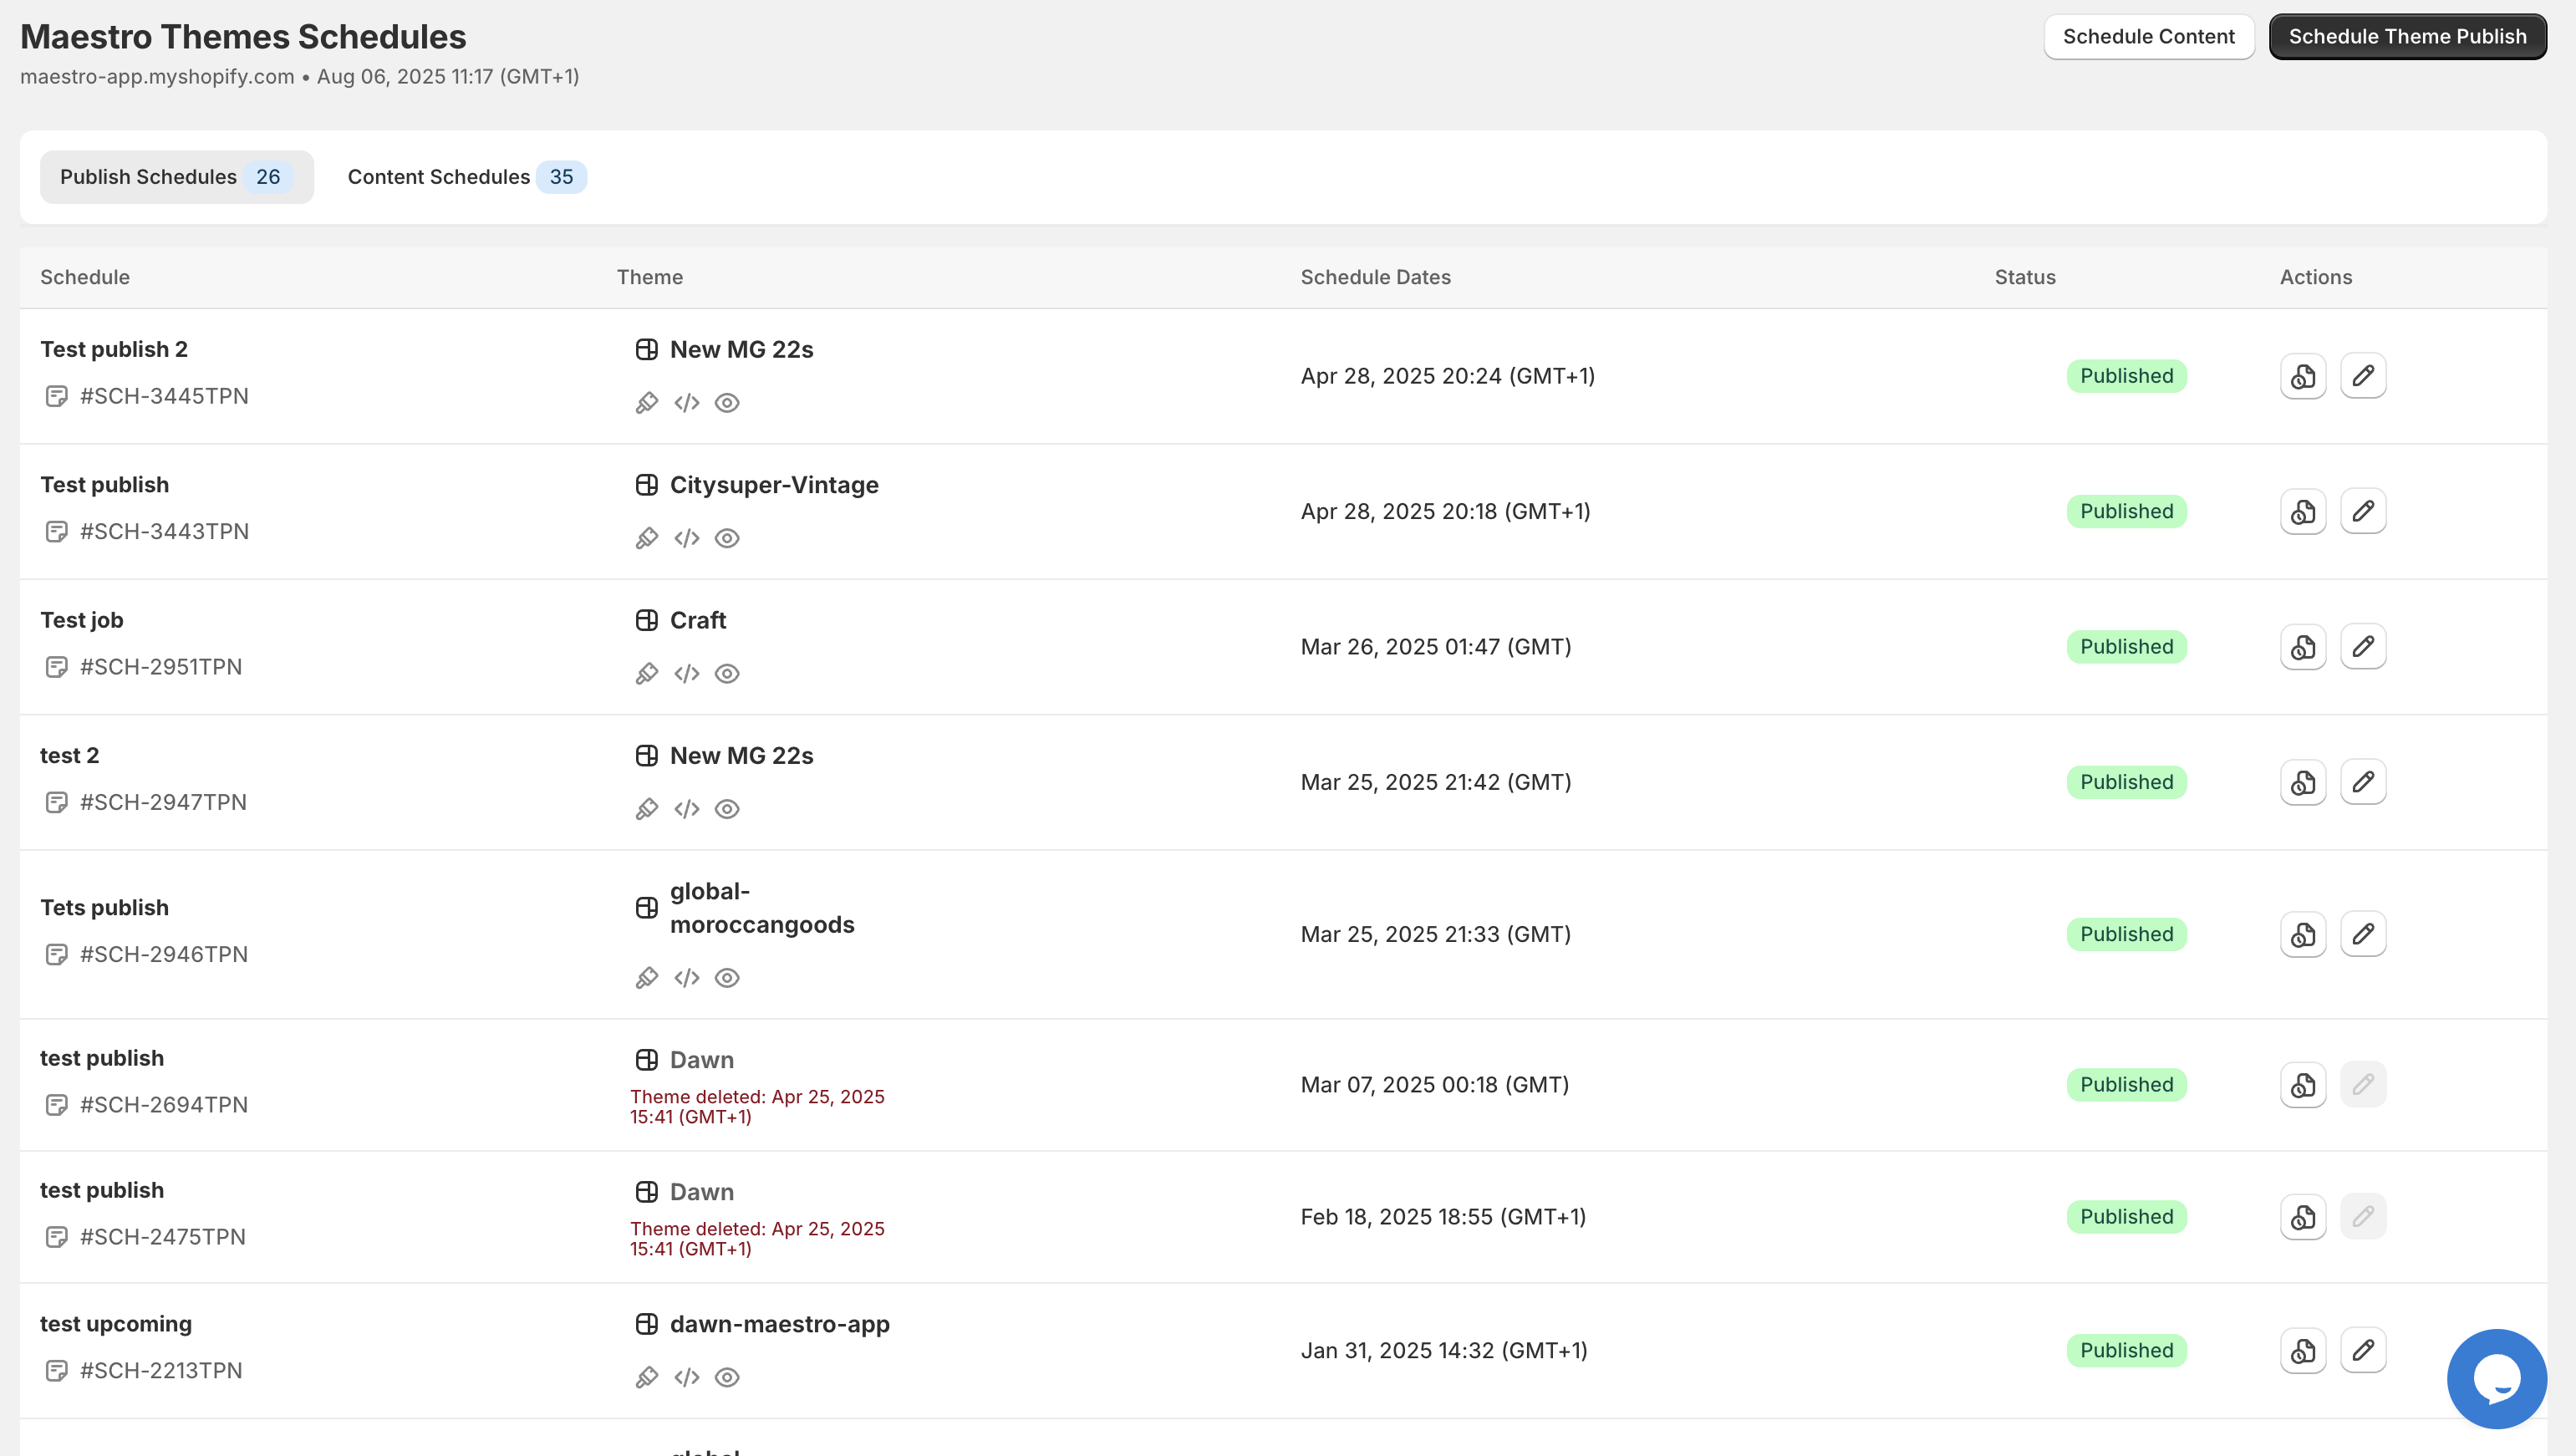
The dashboard gives you a clear view of all your scheduled updates. You can see exactly what is going live and when, making it easy to manage even the most complex campaigns.
How Multi-Schedule Support Works
The magic of Maestro Theme Scheduler lies in its ability to handle multiple templates from a single control panel. Here is how it breaks down:
Home Page Schedules Your homepage is usually the first thing customers see. With Maestro, you can schedule banner changes, hero images, and promotional sections to go live exactly when your sale starts.
Collection Page Schedules Collection pages often need their own treatment during campaigns. Maybe you want to highlight sale items or add a seasonal header. You can schedule these changes independently or sync them with your homepage updates.
Product Page Schedules Product templates can include badges, promotional text, or limited-time offers. Scheduling these alongside your other pages ensures every product reflects the current campaign.
The key benefit is that you can manage all of these from one place, with synchronized timing that ensures nothing falls through the cracks.
Step-by-Step: Grouping Schedules for a Global Sale
Let me walk you through how to set up coordinated theme updates for a store-wide campaign. This process works for any major sale, product launch, or seasonal promotion.
Step 1: Plan Your Campaign Elements
Before touching Maestro, map out what needs to change across your store:
- Homepage hero banner and promotional sections
- Collection page headers and featured products
- Product page badges or sale messaging
- Any footer or announcement bar updates
Write down each element and note which template it belongs to.
Step 2: Create Your Theme Variations
In Shopify, duplicate your current theme and make all the necessary changes for your campaign. This becomes your "sale theme" that will go live when the promotion starts.
You can also create a second variation for when the sale ends, reverting everything back to normal.
Step 3: Set Up Grouped Schedules in Maestro
Open Maestro Theme Scheduler and navigate to the scheduling interface. Here is where the multi-schedule support shines:
- Name your schedule something clear like "Summer Sale Launch"
- Select the theme you want to publish
- Set your date and time for the exact launch moment
- Add notes to remind yourself what this schedule covers

The Advanced Tools interface lets you see all supported settings at a glance. You can schedule content settings, grouped schedules, and even integrate with Shopify Flow for more complex automations.
Step 4: Set Synchronized Launch Times
The critical step is ensuring all your schedules trigger at the same moment. Maestro allows you to set precise times down to the minute, so your homepage, collections, and product pages all flip together.
For global sales, consider your audience's time zones. A midnight launch in New York hits differently than one in London. Plan accordingly.
Step 5: Test Before Going Live
Never skip this step. Use a staging environment or preview your scheduled changes to catch any issues before customers see them. Look for:
- Broken layouts or missing images
- Inconsistent messaging across pages
- Mobile responsiveness issues
- Links that point to the wrong destinations
A few minutes of testing can save hours of damage control.
Step 6: Monitor and Adjust
Once your campaign is live, keep an eye on performance. Maestro's timeline feature shows you exactly when each theme was published, making it easy to track your campaign history.
If something needs tweaking mid-campaign, you can schedule adjustments without disrupting the rest of your store.
The Bigger Picture: Building an Automated E-commerce Stack
Theme scheduling is just one piece of the puzzle. For merchants running frequent campaigns, automation across your entire operation makes a significant difference.
Consider pairing Maestro Theme Scheduler with Product Maestro for automated product publishing and visibility controls. When your theme updates go live, your products can automatically appear or hide based on your schedule.
For post-purchase automation, Claimify helps manage claims and returns efficiently, ensuring your customer experience stays smooth even during high-volume sales periods.
Together, these tools create a workflow where campaigns practically run themselves.
What You Gain by Automating Theme Updates
Let me be direct about the benefits:
- Time savings: What used to take hours now takes minutes to set up
- Consistency: Every page updates simultaneously, no gaps or mismatches
- Reduced errors: Automated schedules eliminate human mistakes
- Better sleep: No more midnight launches or early morning panic
- Scalability: Run more campaigns without burning out your team
For merchants on Shopify Plus or those scaling rapidly, this kind of efficiency is not optional. It is how you stay competitive.
Ready to Coordinate Your Next Campaign?
If you are tired of the manual theme update shuffle, Maestro Theme Scheduler is worth exploring. The multi-schedule support and synchronized launch times make coordinating store-wide updates surprisingly simple.
For more Shopify tips and automation strategies, check out our Shopify blog or dive deeper into Maestro Theme Scheduler guides.
Your next big sale deserves a seamless launch. Let the automation handle the chaos.